On this new beautiful day, what could be better than taking your time to have fun while learning to draw a new insect from the farm? Charles, the little farmer, offers you a new simple and effective tutorial, to follow step by step with many clarified descriptions, for a guaranteed result on your paper.
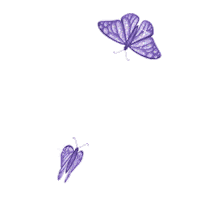
Why not trace the curves of a marvelous butterfly which is the very representation of freedom, splendor and change. With it twirls our hopes and our beliefs for a better tomorrow. The butterfly, resulting from the caterpillar (its larva), is of an unnamed beauty, there are between 120 and 150,000 species; of all colors, shapes or sizes.
Whether you are a fan of this flying insect or not, this tutorial will entertain you. No matter your level: whether you are a pure beginner or an expert in drawing, whether you are an adult or even a child… The magic of the butterfly combined with the simplicity of this guide and the fun activity that he represents will surely make you have a good time, alone or accompanied.
We will accompany you throughout the realization of your sketch, giving you advice , detailing each of the steps and simplifying them as much as possible, so that even if you have very few skills you will succeed in doing it. fly your butterfly.
This new drawing course on the butterfly is found in a long series of drawing courses on the different elements of the fauna and flora of the farm. All of these drawing lessons are downloadable and printable which allows you to take them everywhere, distribute them so that everyone has a tutorial in front of them …. everything happens at the bottom of the page! For all the true butterfly enthusiasts, we have made you a unique collection of objects & gift ideas on the theme of butterflies ?
![]()
![]()
The supplies needed to be able to hatch our butterfly ?
- A marker, a pen, a pencil or a simple charcoal to trace the lines of your butterfly.
- White sheets or just one to let your creativity and talents take their place.
- To give color, full of color, to your insect, you will need gouache, markers , “simple” colored pencils , chalk, paint or water-based paint, grease chalk.. Finally, any material that can bring life to the drawing, the choice is yours!
- A pencil sharpener and an eraser to be able to have the best possible mine and especially to then be able to erase the disasters that will be made with the latter!
- Do not put pressure on yourself, even if you are in competition with your friends or your family, it is a hobby and do not forget that the primordial beauty is that which you give to it.
- Don’t forget the print function from our tutorial.
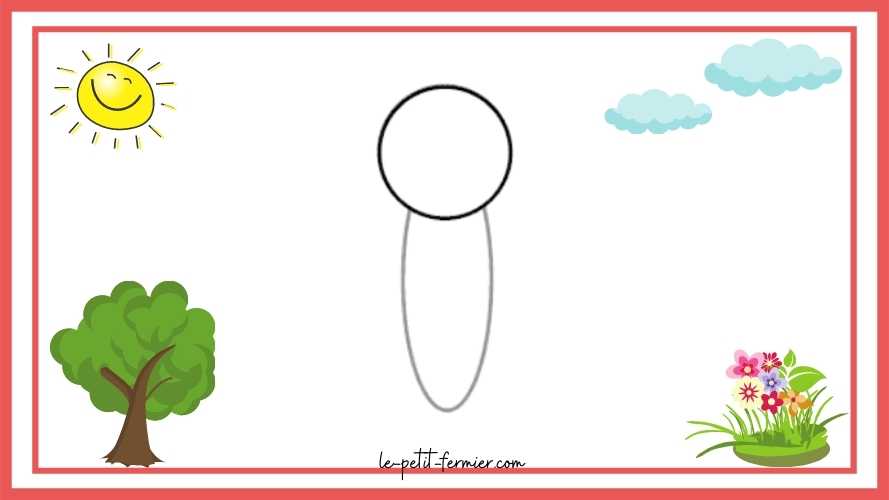
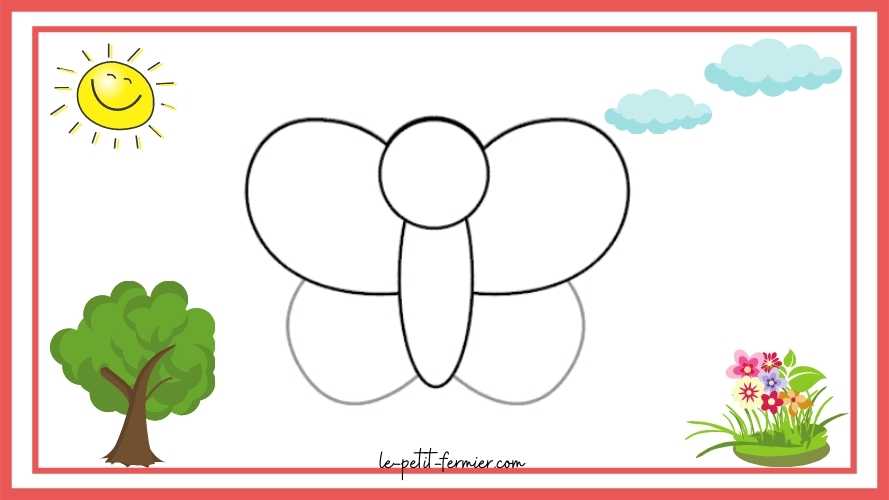
Step 1: The butterfly’s head
- Take a deep breath, we’ll get started, please make sure you have all the materials you have deemed necessary available. When you’re ready then let’s go!
- The first stage of the drawing is very simple, it is a question of drawing the head body of the flying insect.
- For the sketch of the head , you just need to draw a circle in the middle of your sheet or any medium. Here the shape must be as round as possible, do not hesitate to train yourself, use a compass or a drawing ruler… If your head looks more like an oval, there is no problem, the latter will be perfect in all the cases.
![]()
![]()
Step 2: The body of the insect
- Let’s continue with the body , for this draw a line (in the shape of a larva), starting from the bottom left side of the head, going down to half of the drawing sheet and then going up on the right side of the head of the butterfly.
- If you want more details, do not hesitate to look at our own sketches as an example.
![]()
![]()
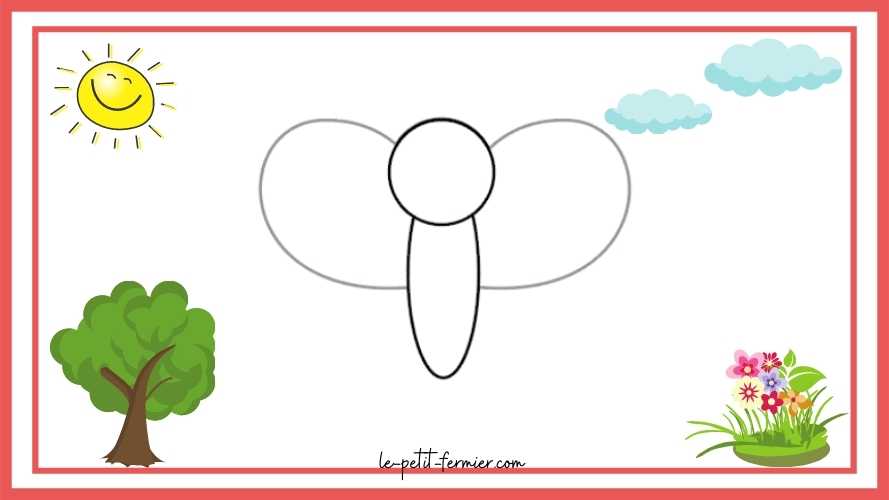
Step 3: The large wings of the butterfly
- We would like to remind you that it is not because your sketch does not resemble ours or that of your loved ones that the latter is ugly or failed, wait until the end of the tutorial to see your final butterfly.
- In this step we will move on to the most characteristic feature of the butterfly, that is to say its wings. Butterfly wings can be any shape, color and size. The different species are differentiated by these characteristics.
- We have chosen to draw wings in two stages .
- First, draw the main wings of the insect, they will be bigger and larger than the lower wings. Take your pen, pencil or marker and draw, on each side parallel, wings starting from the top of the head and going down to the middle of the belly.
![]()
![]()
- In a second step you will reproduce this step for the lower wings , which you will start from the bottom of the upper wings and which you will bring down to the bottom of the body of the butterfly.
- If your wings are not quite symmetrical there is no problem with that, indeed in nature butterflies are very rarely perfectly symmetrical between their left side and their right side. In addition, it adds charm to your drawing!
![]()
![]()
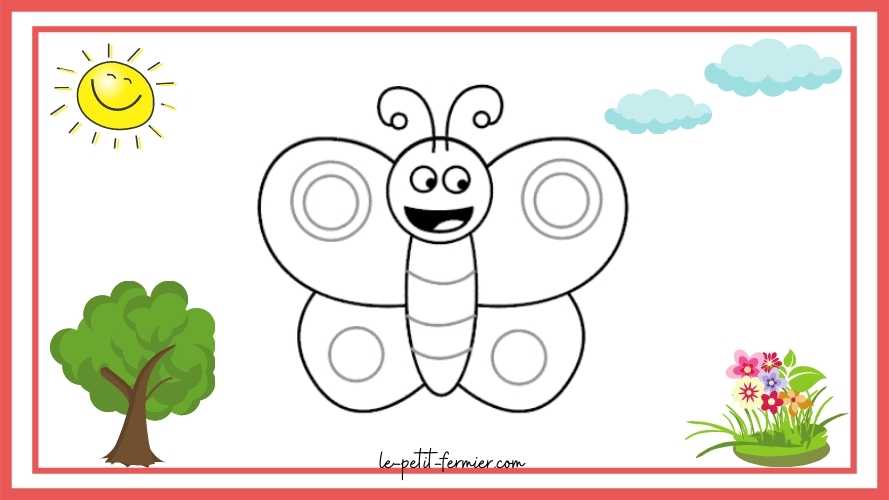
Step 3: The butterfly’s face
- It’s time to give our butterfly a face so that it is a little more expressive and shows us how much it loves life!
- Start by drawing his eyes , in the center of his head you will draw two symmetrical circles, then inside you will draw two solid circles which will look at the same point.
- As for its mouth, you just need to draw a lying D, which will perfectly represent the insect’s big smile .
- Finally, it’s time to draw antennae above its head. Trace from the top of the skull small antennae rolled up and surmounted by a small circle.
![]()
![]()

Step 4: Shapes on her body
- We are already at the last stage of making the sketch of the insect. Isn’t it easy to bring it to life and draw it by following our different steps?
- Here we go, to start we will draw lines on his body to give him more realism. So draw 4 or 5 lines on the insect so that these lines are spaced the same distance and they “fall” a little in their center.
- Now you can customize his wings. The wings of the butterfly are a bit like its trademark and make it possible to differentiate them from each other, they also give it their size and beauty .
- On the wings you can draw a circle at each end that you will color in a different color.
![]()
![]()
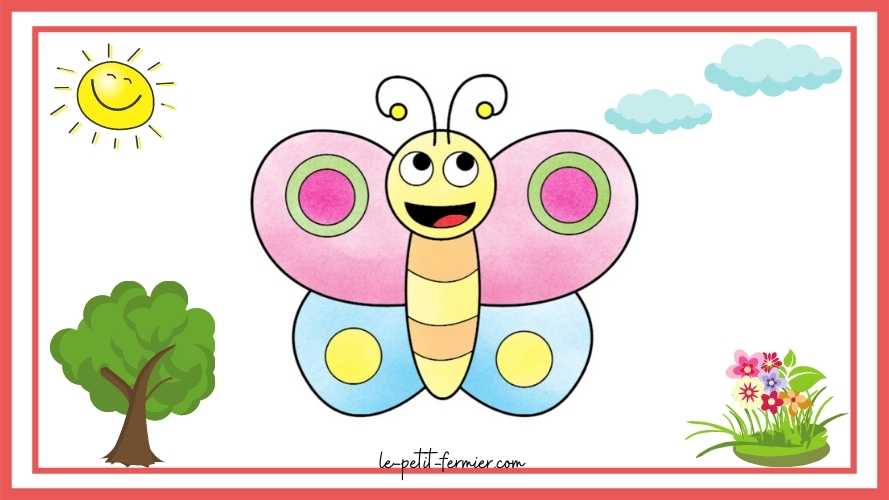
Step 5: How to color a butterfly?
- You have arrived at the last step which is also the most fun ! Indeed, it is now up to you to apply the colors you want to your little insect. You can opt for your favorite colors, colors of the same shades, pastels, warm or cold colors … Finally you see the thing, it’s as you want!
- We advise you to do two color themes , colors for the wings and colors for the body, especially since the body is generally not very colorful. We opted for yellow and orange/brown for the body and wings in pink and blue tones.
- It’s up to you to let your creativity speak!
![]()
![]()
Conclusion on how to easily draw a butterfly ?
We knew the beauty of this insect, but you have in your hands one of the most beautiful specimens that we had seen so far… Bravo! You have done very well with our tutorial and you now know how to draw a butterfly properly.
It’s good to know how to draw, but come and read some facts about butterflies, it’s interesting:
- The butterfly has a particular life cycle , indeed it is born in the form of an egg where it will hatch a caterpillar which will develop until it will turn into a chrysalis before giving life to the butterfly as we know it.
- The lifespan of butterflies is very short, it can be from only one day to three or four weeks… Their total life cycle lasts between 2 and 8 months on average.
- Butterflies are one of the most diverse races with around 180,000 species worldwide and over 4,000 in central Europe. In addition, more than 700 new species of butterflies would be discovered each year.
The butterfly is a pollinating insect and is very important for nature.
Make way for the advice of Charles the Little Farmer for your success
- Whether you have succeeded in drawing your butterfly or it remains more of a draft, don’t worry, the most important thing is to have tried it and we give you some advice below to perhaps be more successful in the next lesson . . Besides, which one would you lean towards: the cow, the cat, the fox, the caterpillar, …?
- Our drawing lessons are learning and leisure activities, you should not put pressure on yourself or anything that would be totally counterproductive. So don’t listen to your colleague who is trying to destabilize you, the most important thing is to do your best and that is also the key to success.
- Do not hesitate to try all the colors, shapes and materials possible and unimaginable. Art never stops evolving and it is you who allow it! So let your imagination run wild .
- For the clearest possible result, do not press too hard on your pencils when you sketch the lines, they must be visible, but also completely erased when you erase them .
- The realism of your butterfly can be accentuated by working on its shades and shadows , it’s very simple.
- If you want a result that blends more with the domain of manga , cartoons , comics , fantasy … Charles advises you to accentuate the thickness of your contours.
It’s up to you to choose your next work
Do you want to repeat the experience? So don’t wait any longer and come and see all of our drawing lessons!
Here there is something for everyone, because these tutorials are always so simple, easy to do and quick so they are perfect for young and old, professionals and beginners.
Our tutorials are all available at the bottom of the page, all you have to do is make your own choice!