
Welcome to the little farmer, you are currently on one of our drawing lessons . Indeed, Charles offers you a multitude of simple to follow and detailed tutorials which naturally allow you to learn how to draw different elements of the fauna and flora of the farm. Today we are attacking a great classic of drawing and our gardens: the rose ! As you know, the rose is recognized as being one of the most beautiful flowers in existence, both for the poetry it exudes, its colors, its shapes, its fragrance and all the romanticism it entails.
Take the time to follow this guide with us, which describes each step of making the rose, step by step , in a simple, clear and detailed way. This tutorial is accessible to everyone so don’t hesitate whether you are a beginner to the point of never having scribbled a few smileys from right to left or a drawing professional who has mastered all the techniques listed… it is also suitable for all ages. Playful, it’s a good idea of activity to do with friends or with children , everyone can express their creativity while learning and practicing on the realization of the sketch.
One last useful information, this drawing course like all our other courses can be downloaded and printed by going to the very bottom of this page. This will allow you not to necessarily need a computer or an internet connection, the paper format is ideal for workshops with children, it protects the electronic device from all disasters. Take a deep breath we are going to attack the drawing of the mythical rose!
![]()
![]()
The essential equipment for a successful rose
- To draw the first lines of your flower, take a pencil , a criterium, a pen , a black marker or even a marker .
- As a support for your sketch, you can opt for a white sheet , a rigid drawing sheet of the Canson type or even a colored sheet.
- Then to color your rose full of techniques available to you, all you have to do is make your own choice between; colored pencils , markers , oil or water -based paint, gouache , chalks or crayons … or any other options that we hadn’t imagined.
- Two other essentials will be necessary for you, it is nothing other than the famous pencil sharpener and an eraser in order to obtain the best possible result and to be able to erase all the failed lines.
- We remind you that drawing lessons are just a hobby and an activity, you have the opportunity to learn how to make different elements, but there is no pressure to put yourself under any circumstances. We are here to have fun and the result is not very important so let yourself go and let your creativity and inspiration speak .
- Finally, if you prefer to work with a paper version of our tutorial, this possibility is available at the end of this page.
- Above all, have fun !
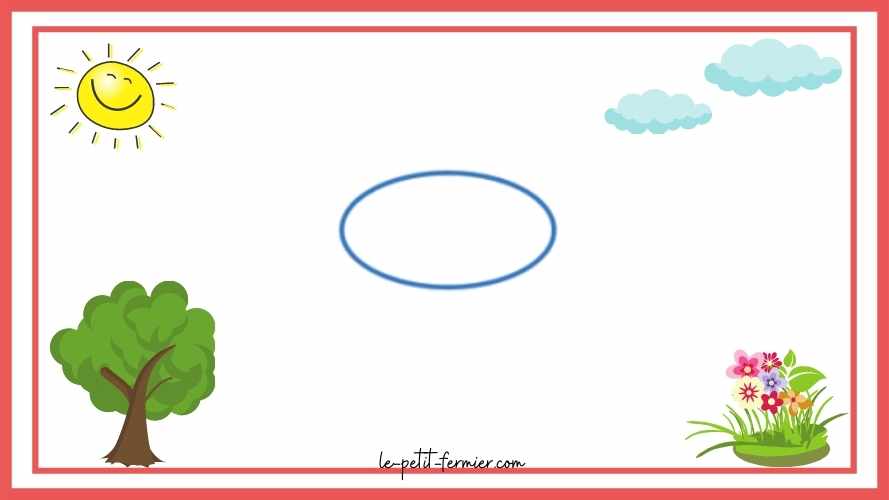
Step 1: The center of the rose
- Let’s go ! We are going to start our tutorial on how to draw a rose, make sure you have all the necessary materials to hand and if it is good for you then we are going to start.
- The first step is very simple… Just draw an oval shape at the top of your page.
- And now step one is complete. (We did tell you that we are simplifying the drawing for you)
- More seriously if your shape is not quite oval and it is perhaps closer to a banal round it does not matter on the contrary, because the rose is the fruit of nature and all roses does not look alike. The “flaws” of your lines will make the difference and the beauty of the flower.
![]()
![]()
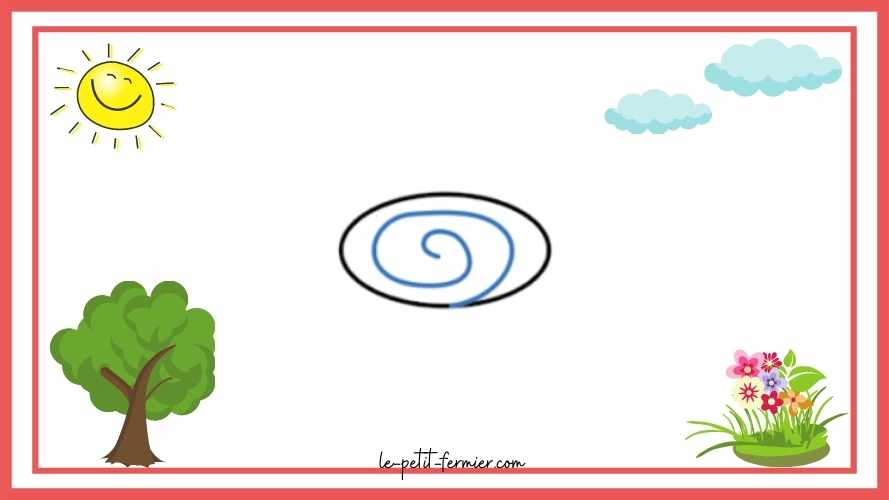
Step 2: The rose bud
- This step is again very simple.
- In the center of your oval shape from the previous step you will be able to draw a spiral starting from the center of your oval and which will join your shape at a point.
- Your bud is now finished.
![]()
![]()
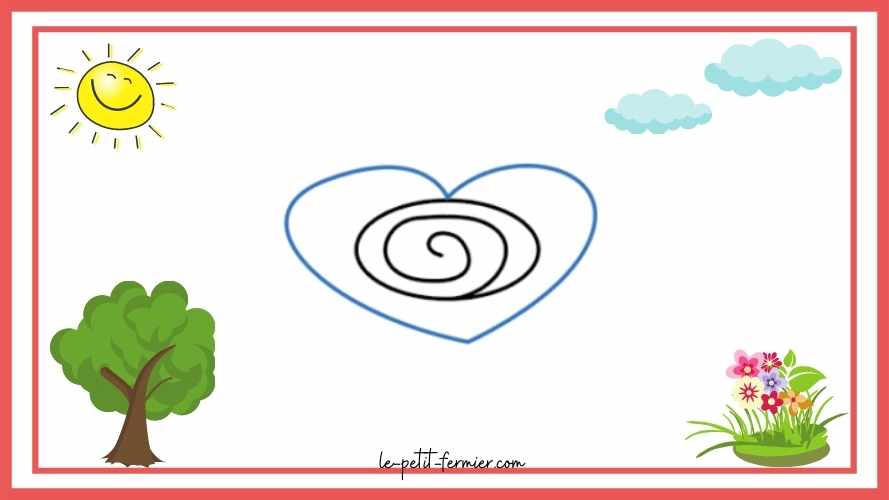
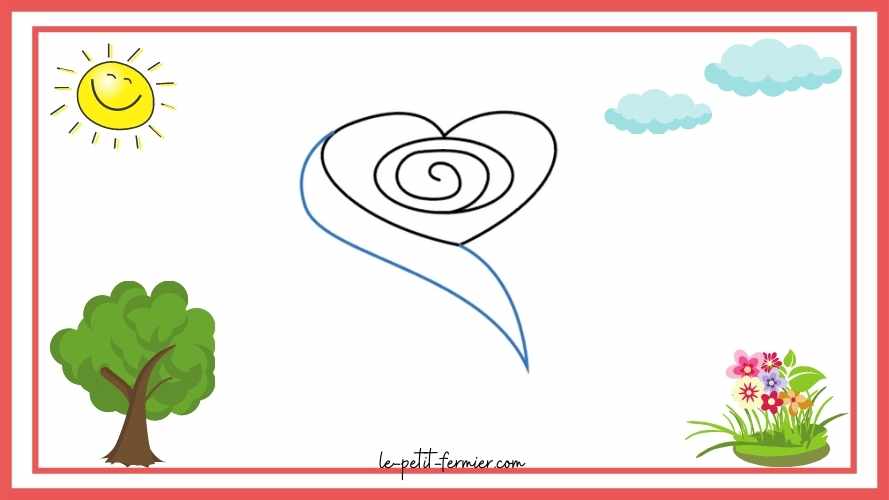
Step 3: The sketches of the petals
- Let’s get down to business now: the rose petals.
- For this you will draw a heart around your oval from step 1.
- You’ll start the heart by touching the top of the bud, the rest of the strokes don’t have to touch the oval.
- We remind you that if the heart touches the bud at several points, it does not matter.
![]()
![]()
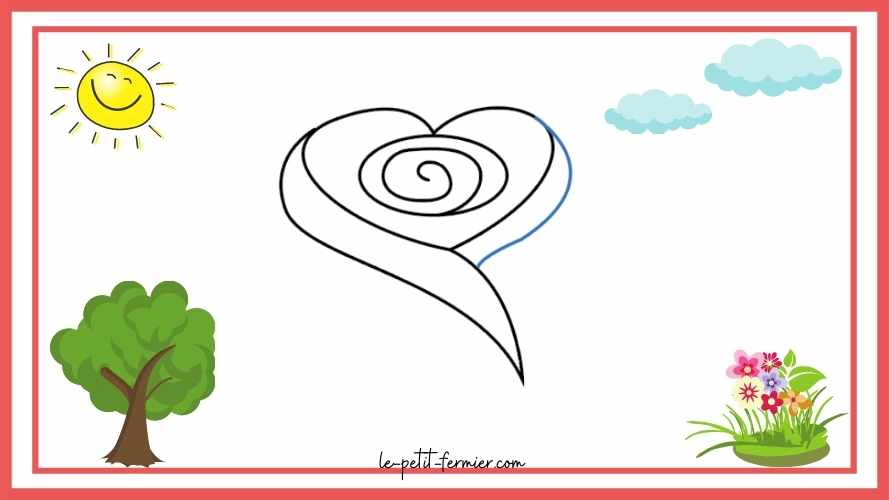
Step 4: The first petal
- We are going to move on to making the first petal .
- To do this, take your pencil and draw a shape along the right side of the from step 3.
- This shape should follow the curve of the heart and descend until it forms a point
- Do not panic, let yourself be guided by the sketch of Charles the Little Farmer below
![]()
![]()
Step 5: The second petal
- Our rose will have to have a second petal .
- It will be a question here of drawing a new curve retracing the right side, this time, of our heart.
- The line will thus join the line of the previous step.
- And here are the petals of your flower are now finished.
![]()
![]()
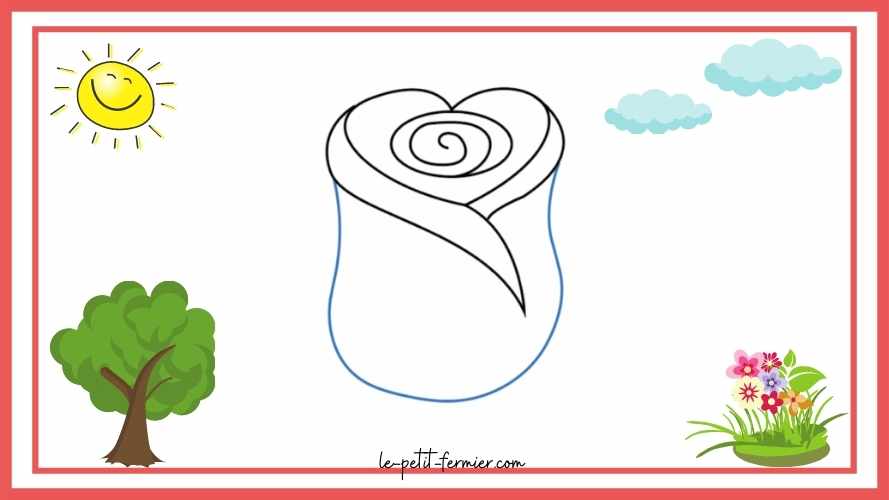
Step 6: The continuation of the rose
- Your flower isn’t finished yet, but don’t worry these are just the last few details, the biggest is done.
- First, you will be able to finish your flower by drawing a U shape starting from the bottom of our left petal, going down forming a pot shape, then going up to reach the bottom of our right petal.
- All shapes are acceptable, let your creativity and your pencil strokes take over.
![]()
![]()
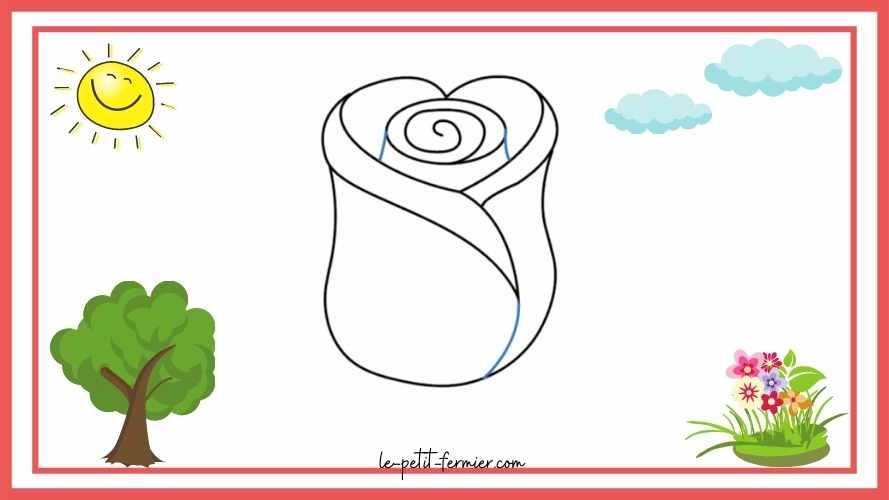
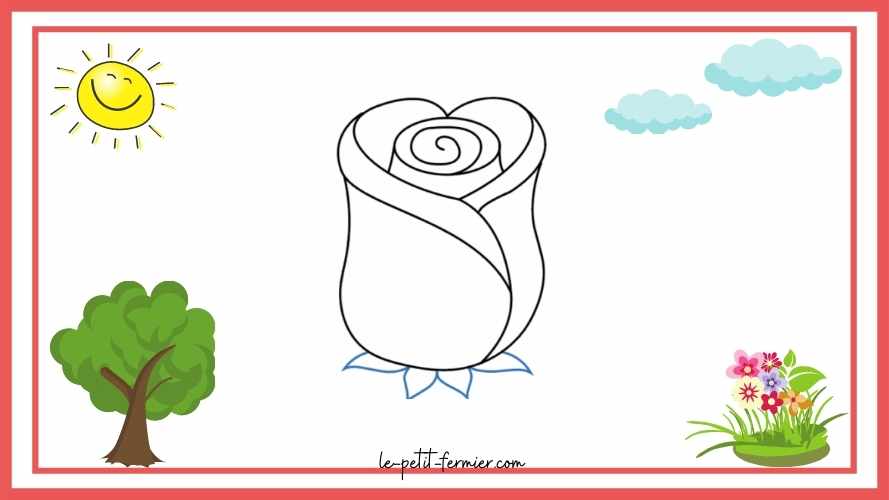
Step 7: Finalizing the flower
- It’s all in the final details …
- In this step, we are simply going to add a few lines to add realism to our rose.
- At the level of the oval shape of step 1, add at the bottom of the latter and on each side, a line that will connect the shape to the heart.
- At the level of the right petal add in the continuity of its point a curve which will thus connect it with the base of the flower.
- TADA
![]()
![]()
Step 8: Leaves
- In this new step, we are going to draw small leaves at the base of our rose.
- Below the rose draw some kind of triangular shapes resembling flowers.
- You can draw four like us, but there can also be more or less.
![]()
![]()
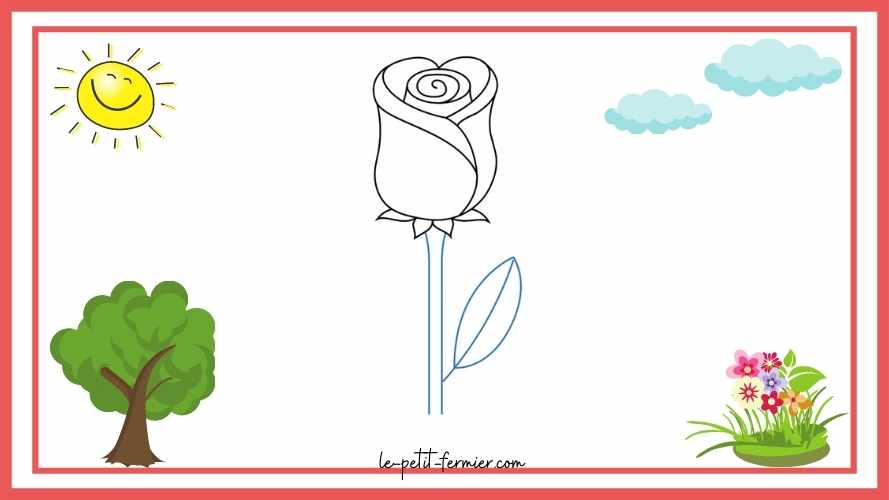
Step 9: The stem and the last leaf
- Still a little patience your rose will hatch! We are well and truly at the penultimate stage of our drawing.
- In this step, we will be able to draw a stem and a large rose leaf .
- For the stem nothing could be simpler, draw two lines, starting from below the leaves of the bud and going down parallel to the bottom of your drawing sheet.
- For the large leaf then, draw a leaf, on the left or right side of the stem, which will be connected to the latter with a small line, and which will be crossed in its entire length by a line.
- Refer to our sketch if in doubt!
- For more realism you can add, all along the stem, small staggered peaks .
![]()
![]()
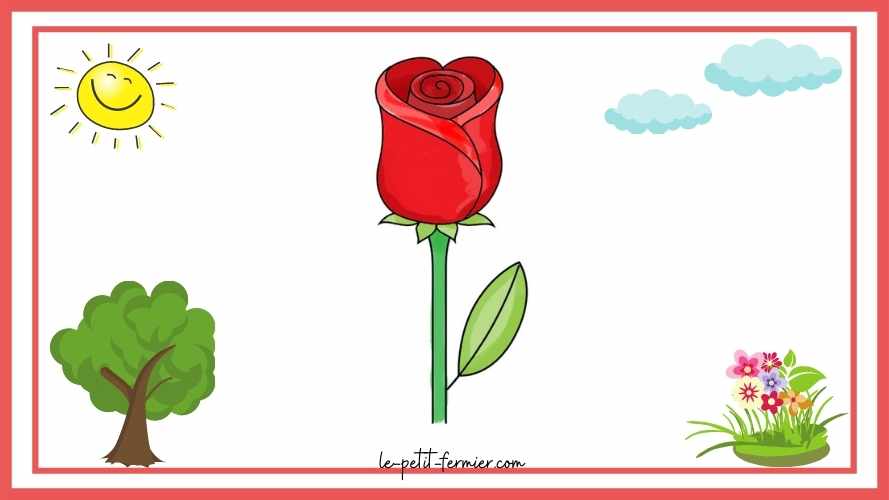
Step 10: Coloring our rose
- Congratulations little budding designers. You have arrived at the last stage of the realization of the rose: its coloring .
- Indeed, it is now necessary to embellish it by giving it colors.
- For the stem and the leaves, we advise you to color these elements in green .
- As for the flower, we opted for red , but you can choose pink, blue, yellow …. or even mix colors.
![]()
![]()
Your rose is wonderful, worthy of the one found at the florist or seen in the movies. You have some great talents, I say! Why not come and continue training by going to see all of our drawing tutorials of the farm and its animals ?
Conclusion of the bewitching rose drawing
The rose is a grandiose and magnificent flower , which knows how to please all individuals, it is also a very beautiful proof of love and friendship.
Consider giving roses for a birthday, party, or just to show your affection. The rose and its shrub, the rosebush, are also very pretty in a garden and give free rein to our imagination when they hatch in the spring.
The rose is like something magical, so here are some facts about it:
- There are 150 species of roses in the world, each characterized by different flowers , petals, colors , shapes and sizes . The characteristics of their shrubs also make them unique.
- The oldest rose bush in the world would today be more than 1,200 years old . Indeed, it would have been planted in 815 AD and is located in Germany in the cathedral of Hildesheim.
- Of course all the colors of roses exist except two! Indeed, without the intervention of Man, there is no completely black rose or roses of a powerful blue .
- Rose derivatives are used in all fields , whether perfumery, cosmetics, food… They are found everywhere.
- The rose is recognized as meaning romanticism , glamour, love , high standing….
Charles, the little farmer, gives you some tips for successful drawings
Did you like our activity? Are you happy with your result? Don’t worry, here are Charles’ tips for a successful drawing every time.
- Don’t put pressure on yourself ! It is just a hobby and a relaxing activity to let your creativity speak and come out. Like any form of art, drawing is not learned by making a drawing, it is indeed a helping hand to be taken and a certain number of training sessions.
- Imagination is the key to success, stand out! There are no previously fixed codes, it’s up to you to create your own. You can evolve in the field you want and use different materials and supplies that will make your trademark: charcoal, markers, paint ….
- Don’t forget to take the time to have your equipment perfect , whether it’s sharpening your pencils or using all the other accessories necessary for the proper functioning of your equipment.
- So that your draft lines are not seen in the final result, do not press your mine, it is a question of drawing sketches which can easily be erased with an eraser .
- The realism of your drawing can be improved by playing on the different shades and shades.
- On the contrary, if you want a less realistic drawing, which is appropriate to the field of manga or comics (cartoon), we advise you to exaggerate the features of your drawing.
What will be your next work?
If you liked learning how to draw a rose you will like our various other tutorials and drawing lessons. We offer you a whole list of drawings that are simple to make, detailed step by step and which are always suitable for all levels. Now, it’s your turn to play !