![]()
![]()

1. Introduce yourself
Hi guys! My name is Cristina Gómez and I am a freelance illustrator and graphic designer specializing in digital illustrations.
In this tutorial, I will demonstrate all the techniques from basic canvas setup to rendering and coloring, and explain how to draw color illustrations for your Instagram. Are you ready?
2. Set up the canvas for Instagram
![]()
![]()
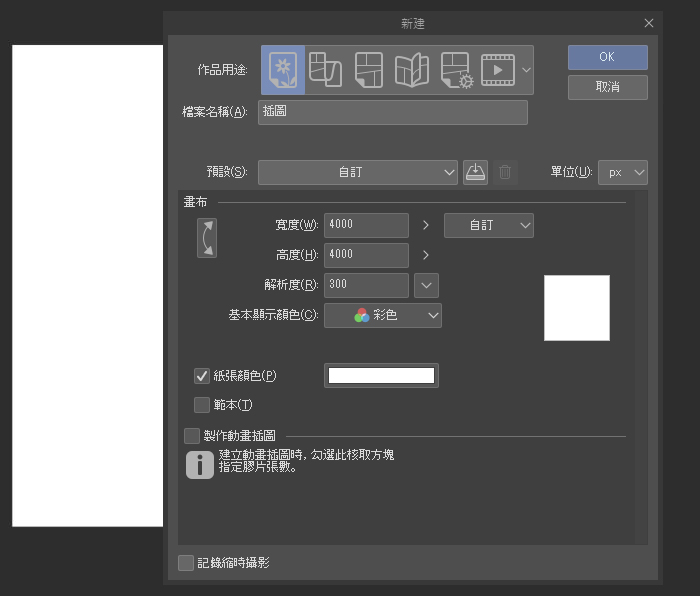
First of all, I have to set the canvas first. My works usually need to be printed, so I will set the canvas size for Instagram to 4000×4000 and the resolution to 300dpi, but if it is used for screen display, it is enough to reduce the resolution to 72dpi. Can show great effect.
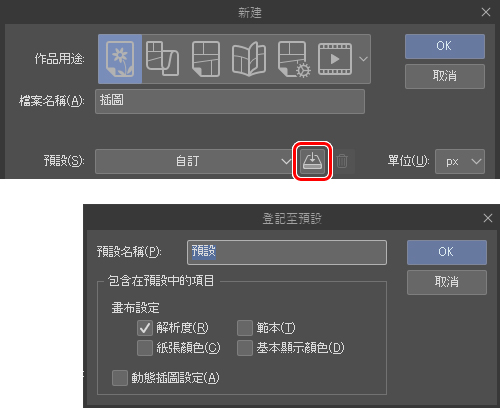
In addition, settings can be registered to presets for next use.
![]()
![]()
3. Get your hands dirty!
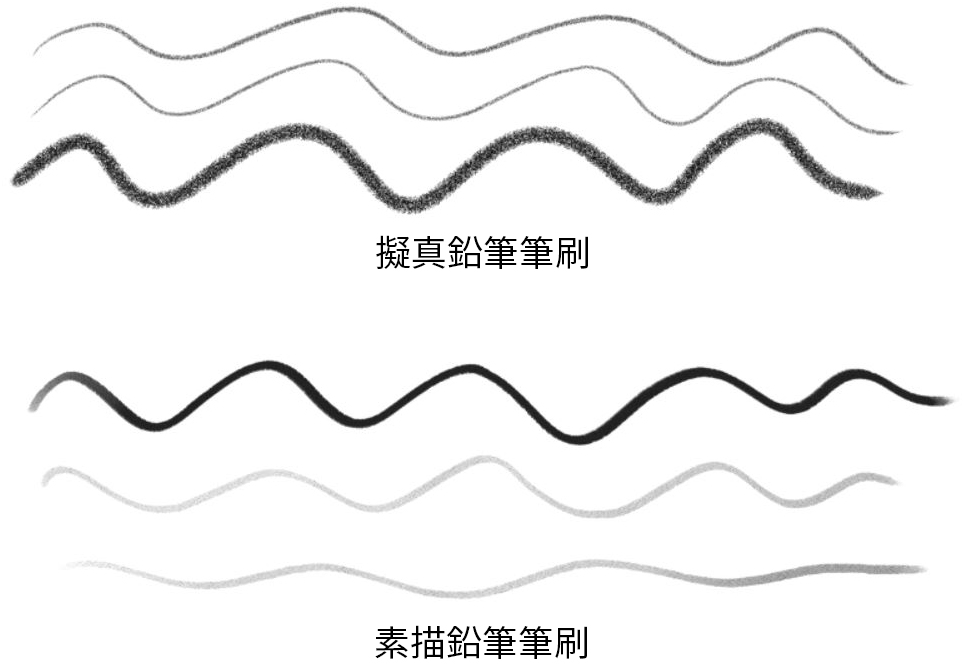
brush
When sketching, I like to use brushes with a hand-drawn texture, such as Realistic Pencils or Sketch Pencils. I like how it looks like it’s actually drawn on paper.
![]()
![]()
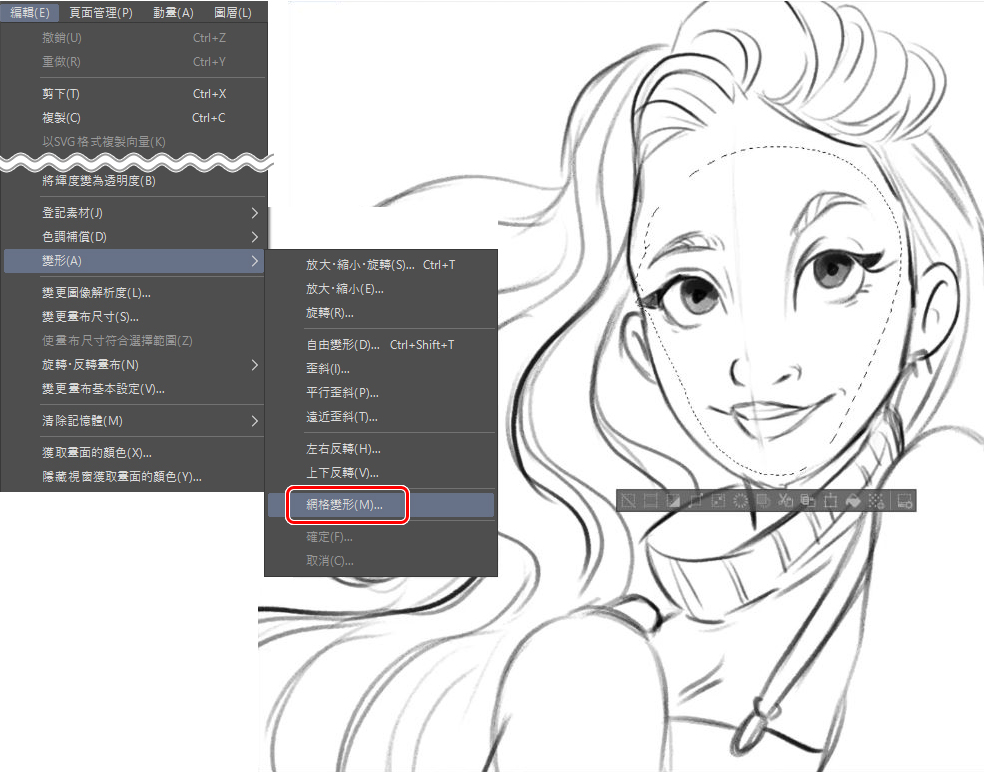
Warp Tool
When drawing drafts, I like to use some tools to adjust the illustration as needed, such as flipping the canvas left and right, warping tools and mesh warping, etc. Using these tools helps me draw the correct proportions and perspective I want to present. Mesh deformation can be done in this way: Edit Menu → Deform → Mesh Deformation .
![]()
![]()
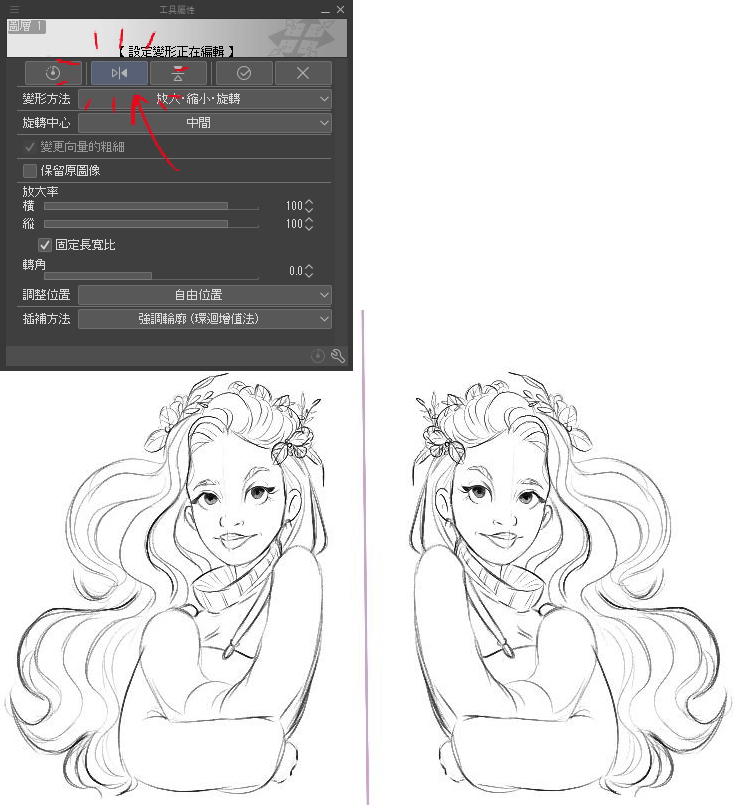
You can also adjust the deformation tool by changing the number of vertices to make the settings more in line with the range you want to adjust.
![]()
![]()

In addition, I also introduce a function that I use very often – left and right inversion. Great for confirming viewing angles from different directions.
![]()
![]()
4. Color time!
brush
For coloring, I used CLIP STUDIO PAINT ‘s built-in brushes, such as the round and oil brushes for flat painting, and they worked perfectly for my needs. For the basic shading of the illustrations, I’m used to using a smooth watercolor brush because it’s especially good for soft effects.
Inking (filling)
Inking is a very careful task. If you want to complete the filling quickly, you must close all the gaps in the line art. When inking I’m used to drawing with vector layers and a vector eraser brush.
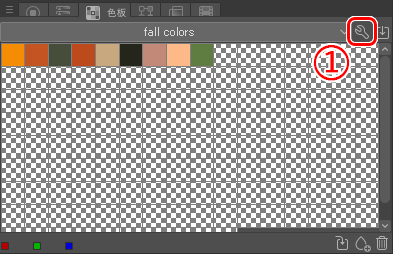
Create swatches
![]()
![]()
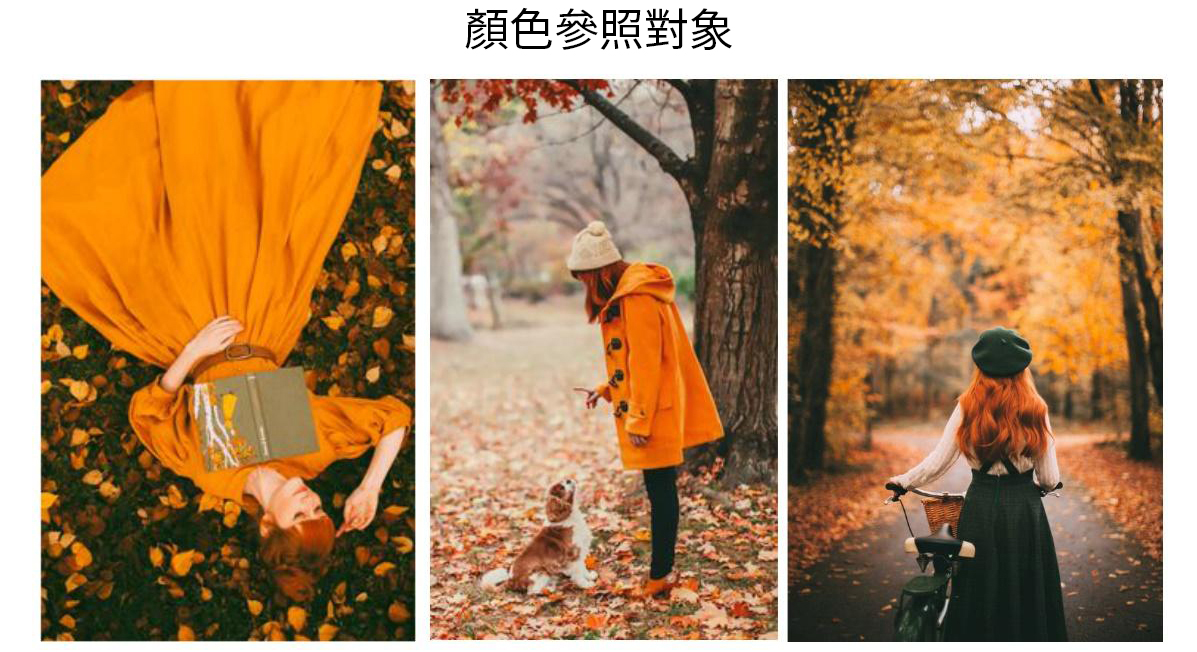
Before painting, the step of establishing a color palette is very important, it can help us clarify and decide the color tone of the painting.
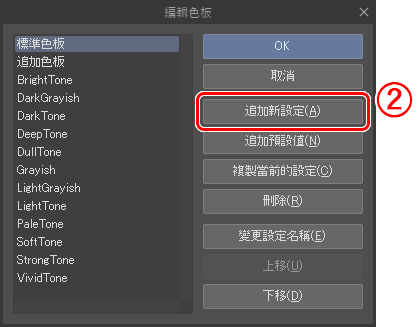
Set swatches:
step 1:
![]()
![]()
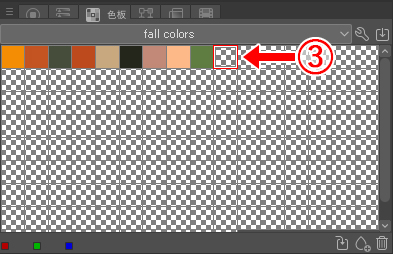
Step 2:
![]()
![]()
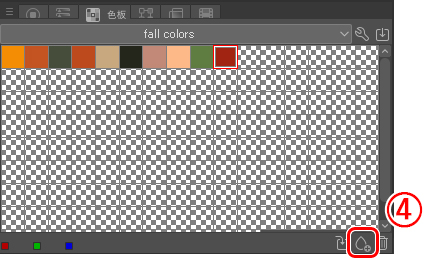
Step 3:
![]()
![]()
Step 4:
![]()
![]()
To complete the palette, we have to repeat steps 3 and 4 until all the desired colors have been collected.
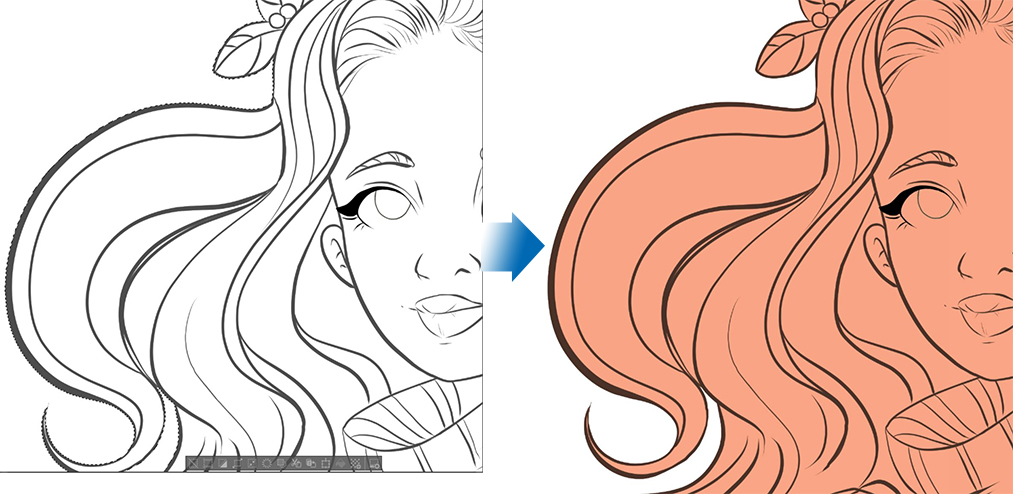
background color
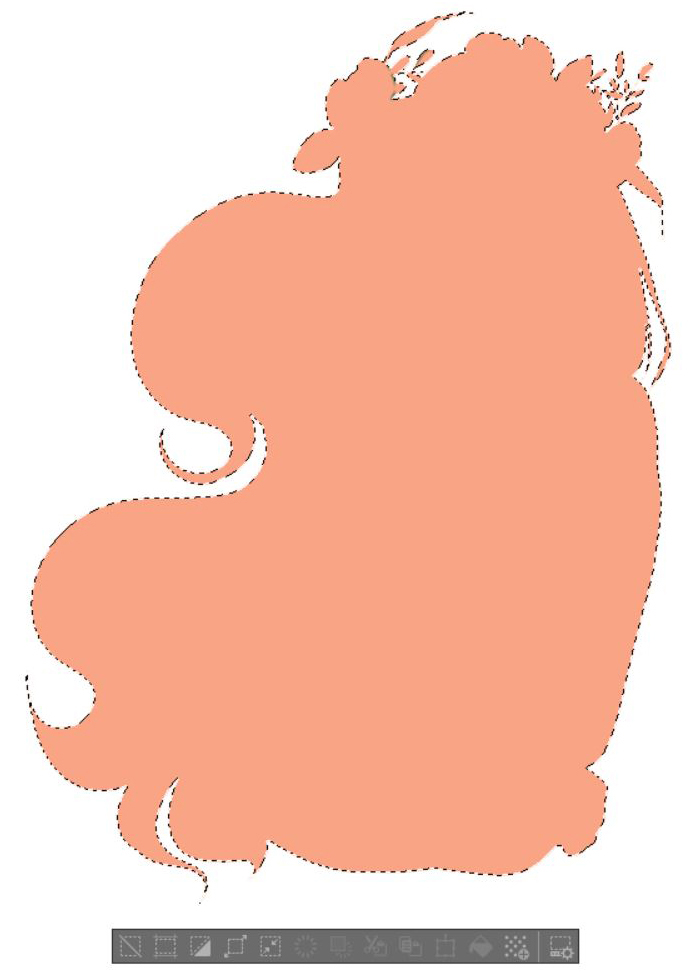
For coloring, my first step is to fill in all the line art ranges. To do this, I use the auto selection tool on the cleaned draft layer, select and check that all the line art is within the selection, and then fill it.
![]()
![]()
Next, start populating all elements of the illustration, such as hair, clothing, etc. There are two ways to fill, use the fill tool on the newly created layer or directly smear with the shape range selected, and use the [ Refer to other layers ] tool in the fill tool to color.
Option 1:
![]()
![]()
Option 2:
![]()
![]()
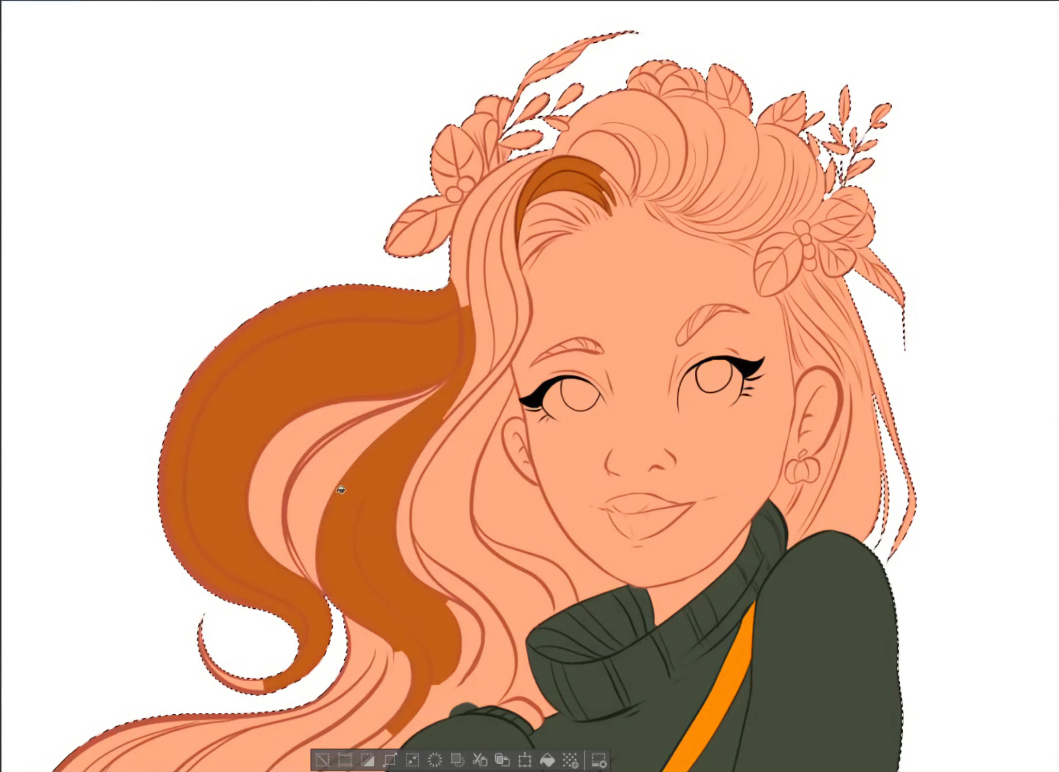
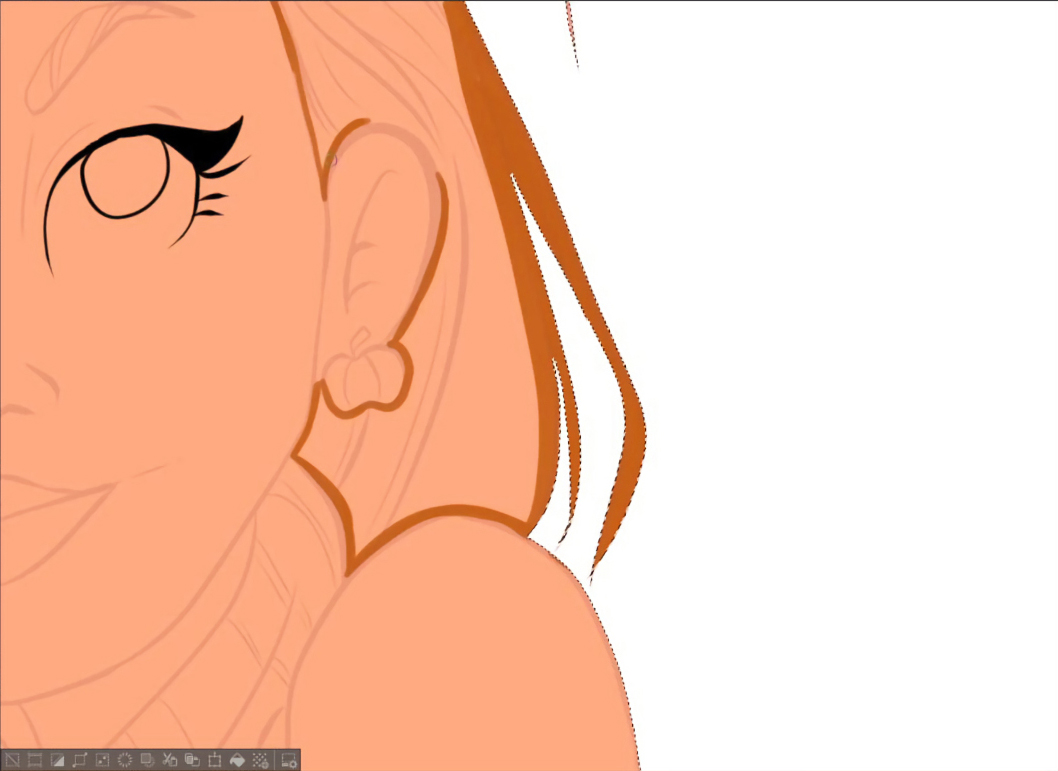
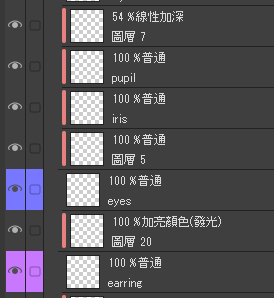
Either way is fine. I separated all the elements in the illustration (hair, eyes, clothes, lips, eyebrows, earrings, and flowers) into new layers and colored them individually.
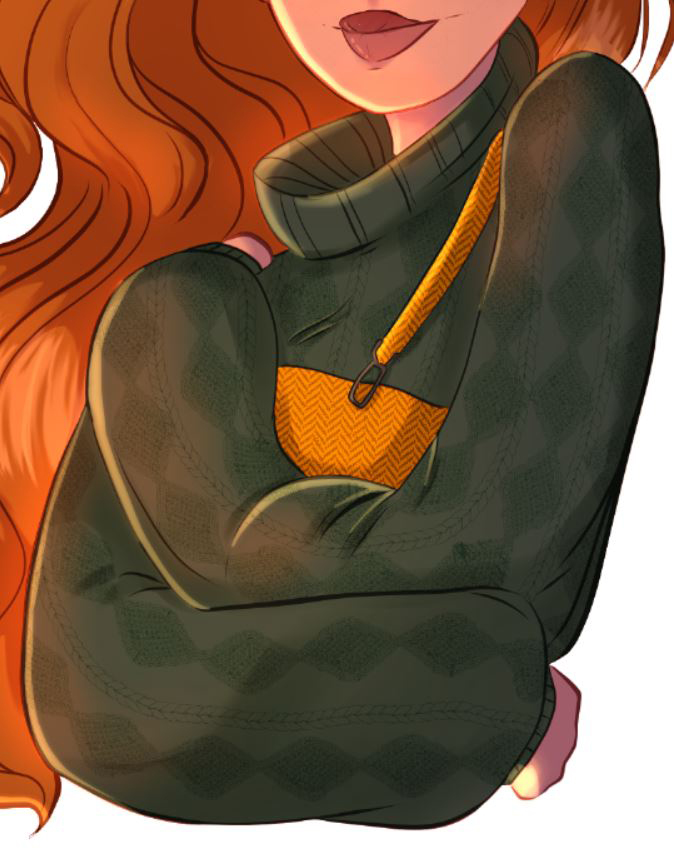
Add shadows and material textures
Using a smooth brush ( smooth watercolor ) in lilac , paint all areas where you want to add shadows. At this point, you can adjust the strength of the brush according to your needs. You can also control the intensity by adjusting the opacity. I will do this on all the elements in the illustration.
![]()
![]()

If you need to add material texture, now is a good time. For example, I would add blush to the face or add some details to the clothes.
![]()
![]()
Use layers
It is very important to use the layer function, try to avoid drawing everything on the same layer. In order to master the use of layers, it is best to be familiar with the functions such as [Clip with Next Layer], [Select Range] tools, and layer blending modes.
![]()
![]()
Add light and shadow
Once the details (hair strands, textures, etc.) are drawn, it’s time to add the highlights. In this step, I will use the [Selection Range] tool ( right click → select range according to the layer , or press Ctrl+left key on the thumbnail of the layer panel ) instead of [Clip with next layer], because I You don’t want these layers to be superimposed on top of the main layer that draws the shadows. If clipping is done with the main layer’s opacity low, the clipping layer’s transparency is also affected, which I don’t want to happen.
Therefore, you have to go back to the base color layer created at the beginning to select the range.
![]()
![]()
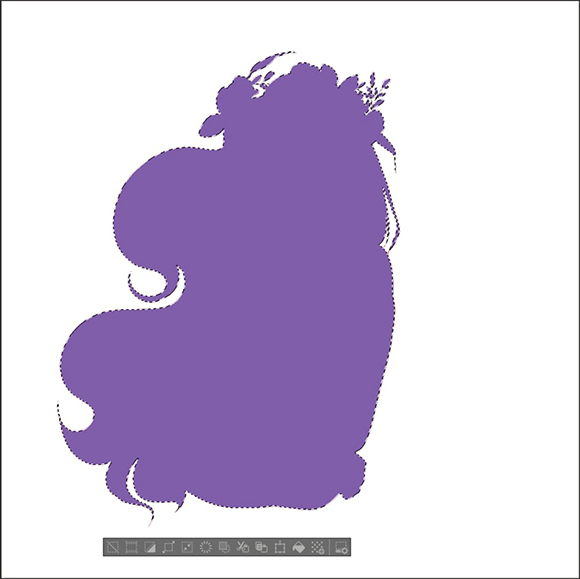
Next, create a new layer on top and fill the selection with a lilac tone ( #815EAA ). It should look like the image below. This is our main shadow layer .
![]()
![]()
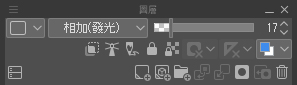
While maintaining the selection, use the tools in the blending mode to adjust the layer until you are satisfied. In the demo, I’ll set the Color Gain Opacity to 28%.
![]()
![]()
After creation, you can create a new layer and add highlight effects without deselecting the selected range. In this step, it is recommended to use a soft airbrush for painting, which can create a gradient effect without using the gradient tool. Therefore, the scope of application can be controlled more precisely.
![]()
![]()

In the top glow layer (above the shadow layer), I paint all the areas that need to be highlighted yellow. In order to perform this step, the main light source must be established first. In the demo, I preset the light source to be from the left side, so I have to pay special attention to the direction when adding the highlight effect (the airbrush paints yellow).
![]()
![]()

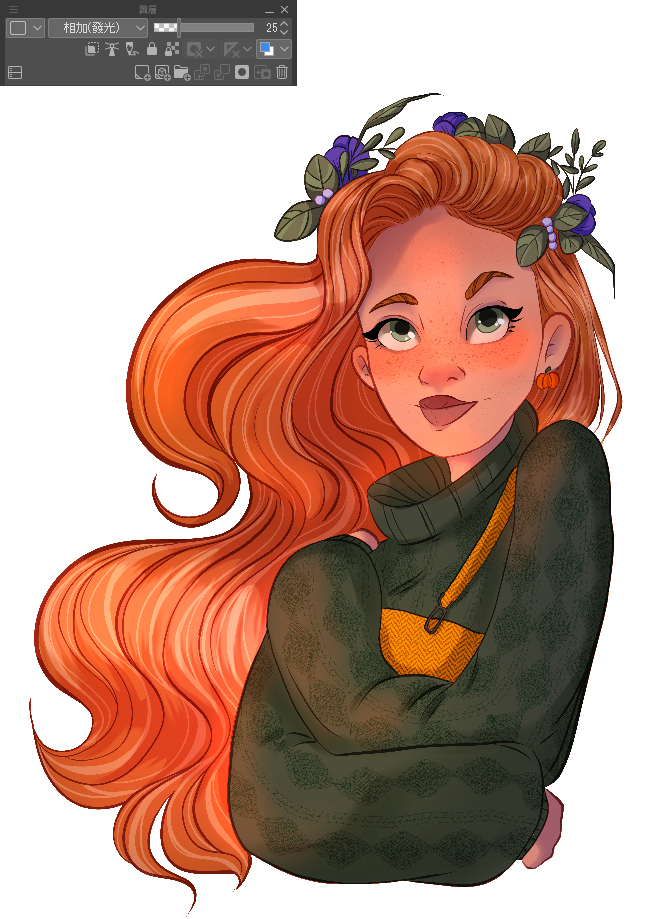
When all the ranges are drawn, it is time to apply the effect in the blending mode that best suits the illustration. For the demo, I chose the highlight color (glow) and adjusted the opacity to 25%.
![]()
![]()

![]()
![]()
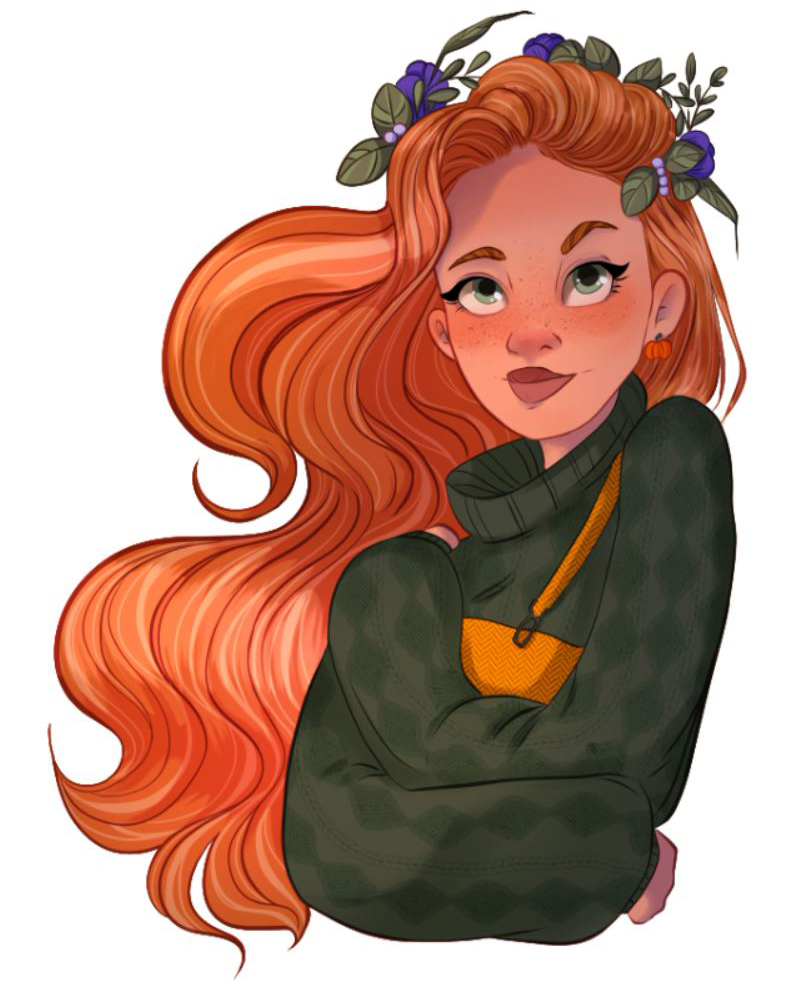
If you look at the image above, you will see that all the areas that have just been painted with yellow will look brighter and more saturated, and the soft light effect will look like an external light source. But the brightness is still slightly lacking. For this, I created a new layer (maintaining the selection) to add some soft highlights.
![]()
![]()
I use a reddish color to paint the parts where I want a stronger shine, such as the forehead, nose, and all the more three-dimensional areas.
![]()
![]()
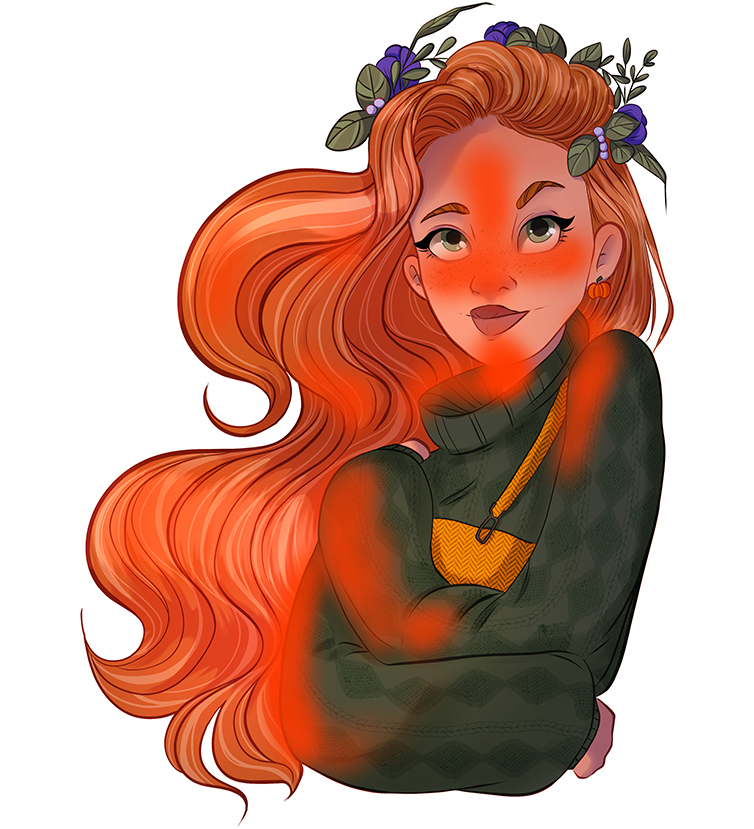
As before, make the shaded range glow by changing the blending mode and changing the opacity. This time I set it to additive (glow) and the opacity to 25%. Of course, you can also apply various settings to try to create a more realistic effect. The effect of the glow depends on the background color of the illustration. For example, on an illustration with a cool base color, it may not be possible to look glowing through red.
![]()
![]()
I want the glowing range to have a more saturated red hue. It has a tangerine hue similar to the setting sun. But it’s not done yet! Now, let’s add some highlights.
Create a new layer on top and add a light yellow light stroke to the tip of the nose, the edges of the face, and all the parts closest to the light source.
![]()
![]()

You should go through this step to set the stroke settings for adding highlights. I used an oil paint brush to paint the strokes from the previous steps, setting the Paint Light and Intensity to 100 and the Opacity to 100%. The goal is to highlight specific ranges with very opaque brushstrokes, making the illustration more visually interesting without being overly flat.
![]()
![]()
Then use Additive (Glow) mode the same and set the Opacity to 25%. The highlights created by the above steps may seem subtle at first glance, but don’t worry, there is one last step left because I want the girl in the painting to be glowing.
![]()
![]()
This kind of glow effect is not difficult to create, and the effect that occurs when characters and objects are exposed to direct light will make the work more three-dimensional. First, duplicate the highlights layer and increase the Opacity above 40% (you can do this later if you need to adjust the intensity of the glow). Now, we have to create a blur effect.
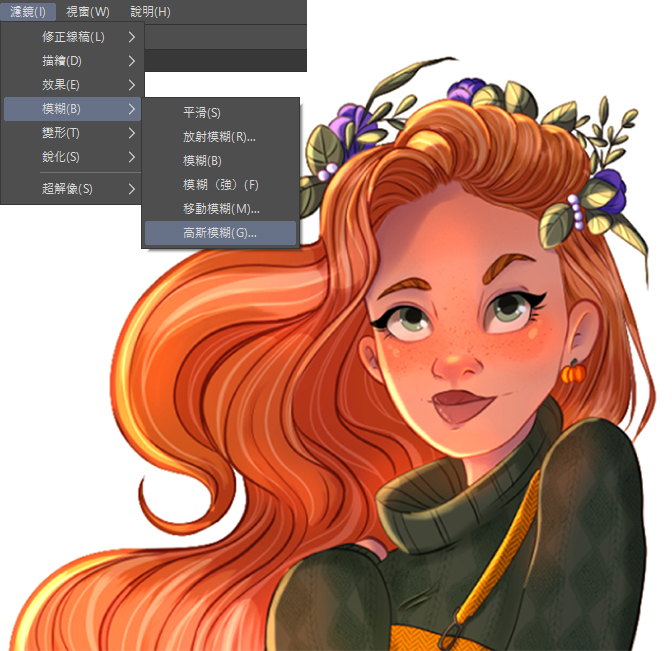
In the [Filter] menu, click [Blur] → [Gaussian Blur].
![]()
![]()
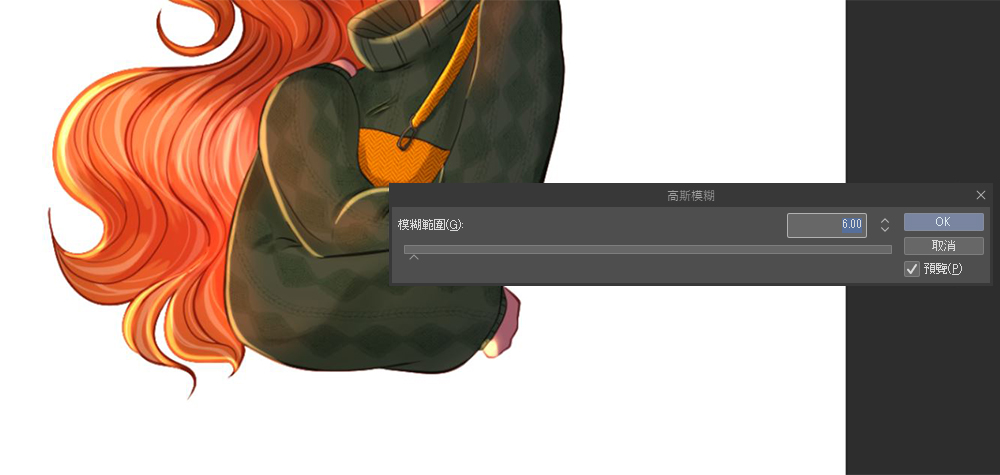
As shown in the image below, adjust the intensity of the desired blur by sliding the small triangle. To avoid color bleed, I don’t use an overpowering effect, I would probably set it around 6 to 10.
![]()
![]()
As a result, you can see that the glowing effect perfectly complements the previously painted highlights.
![]()
![]()
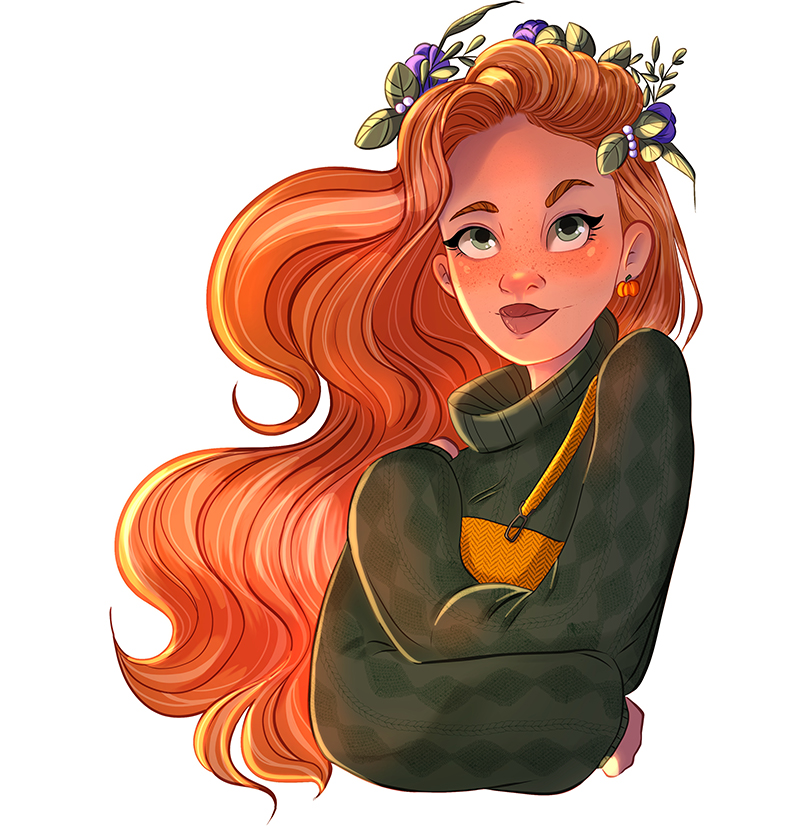
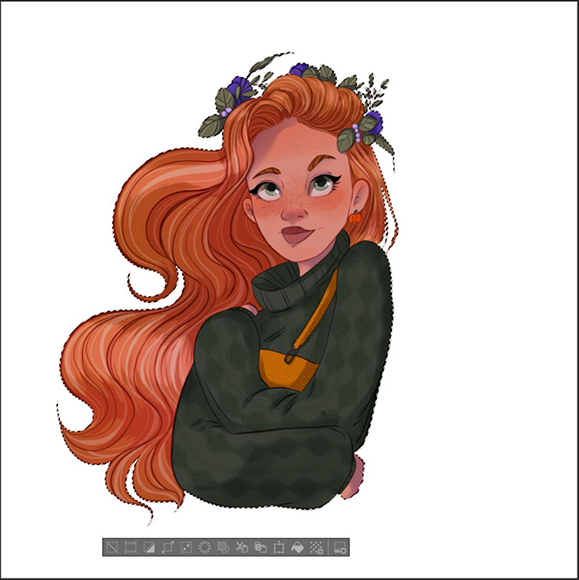
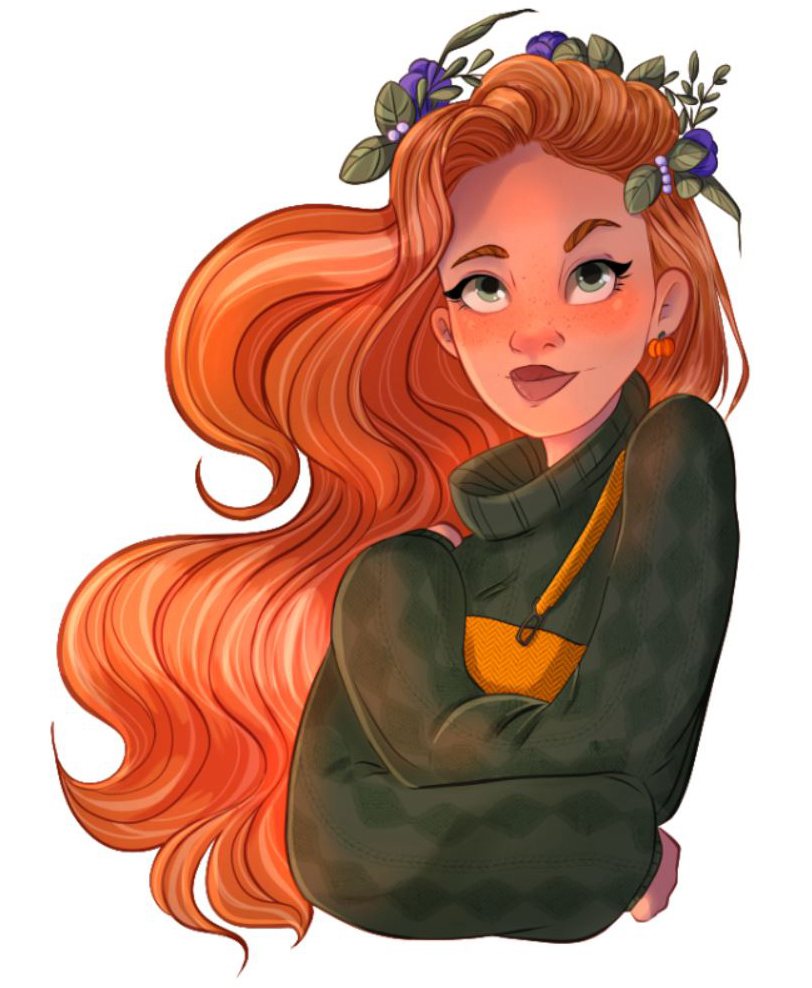
This is the illustration I made for Instagram using CLIP STUDIO , you can also print it if you want. Don’t forget to try new brushes and coloring techniques from time to time. This habit often brings me fresh inspiration, and I also like to discover all kinds of new and practical brushes on CLIP STUDIO ASSETS .
In addition, I want to demonstrate how to color this full color illustration with Clip Studio’s realistic watercolor brushes in some quick steps, and show you the different color effects. are you okay?
5. Realistic Watercolor Techniques
![]()
![]()
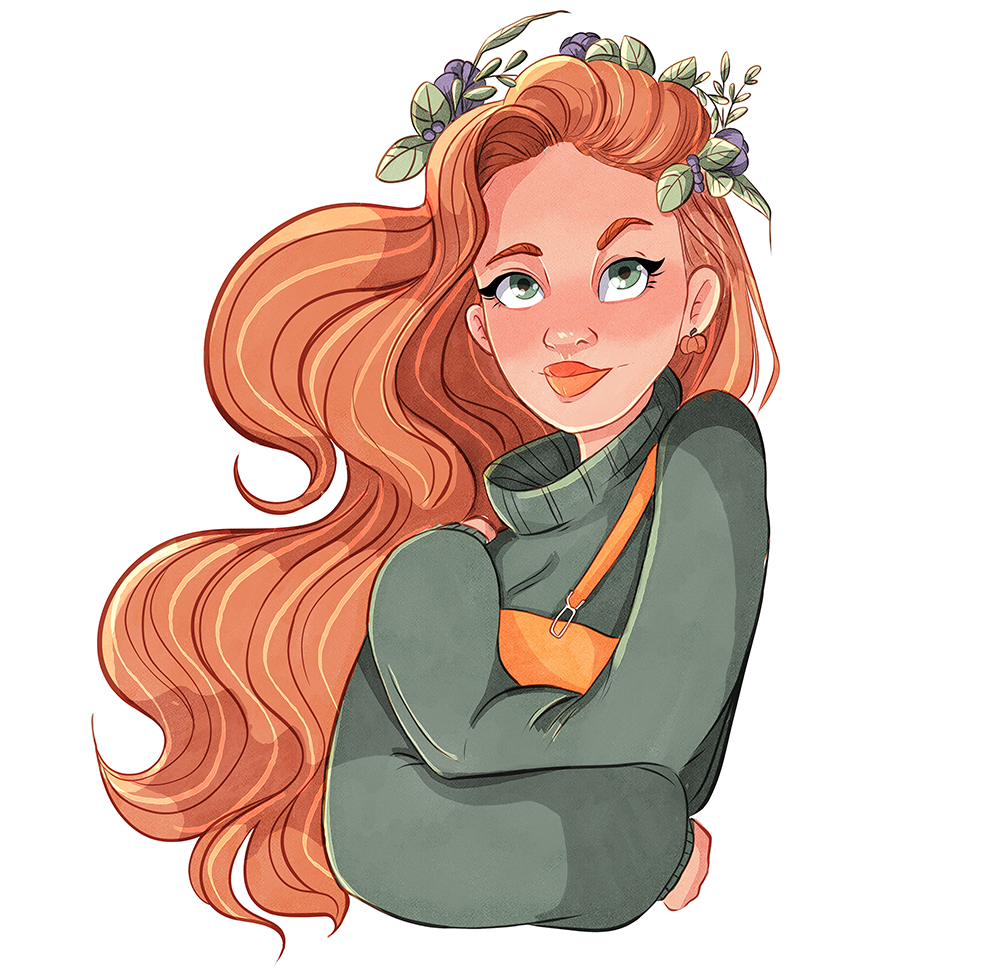
Realistic watercolor brushes are ideal for depicting the atmosphere of traditional painting. Although at first I was really at a loss with these types of brushes because I didn’t know how to use them. In the end, I decided to follow the steps of the previous coloring method, but change the process a little bit:
- I’ll still work on separate layers for the components, but this time I won’t paint all the ranges.
- When the individual components (hair, clothing, skin, etc.) are drawn, I duplicate each layer and set the duplicates to Color Gain or some other blending mode to make the colors more saturated.
- I created a base shadow layer for each element and painted the shadows in a dark purple tone, then tried to find the right blending mode to accentuate the texture of the realistic watercolor.
- So far, I still haven’t added significant highlights to the illustration, because it’s harder to get a full highlight glow naturally in a real watercolor.
Here are the brushes I use:
- Flatten with a watercolor round pen
- Paint shadows using watercolor with textured textures (pressure-sensitive simulation)
- Use smudged watercolor to paint blush
6. The end
That’s all for this lecture.
Whether your work is rendered or painted in watercolor style, hope it helps you create beautiful illustrations for Instagram!
Thank you so much for watching!