
1. Introduction
Hello everyone, welcome to my latest teaching! Do you like animals? In this tutorial, I will teach you how to draw horses in different poses in a quick, easy and effective way. Even though we love animals, it can still be a challenge to represent them on paper by drawing.
Whether it is the theme of this illustration or other paintings, the first key is to refer to the correct template. I will create a template for reference to maximize the completion of the illustration. This time I will use the digital drawing software Clip Studio Paint to explain for you, but the content of this teaching is also suitable for those who use traditional hand-painters or other drawing software. Are you ready? let’s start!
2. Draw the structure as a simple shape
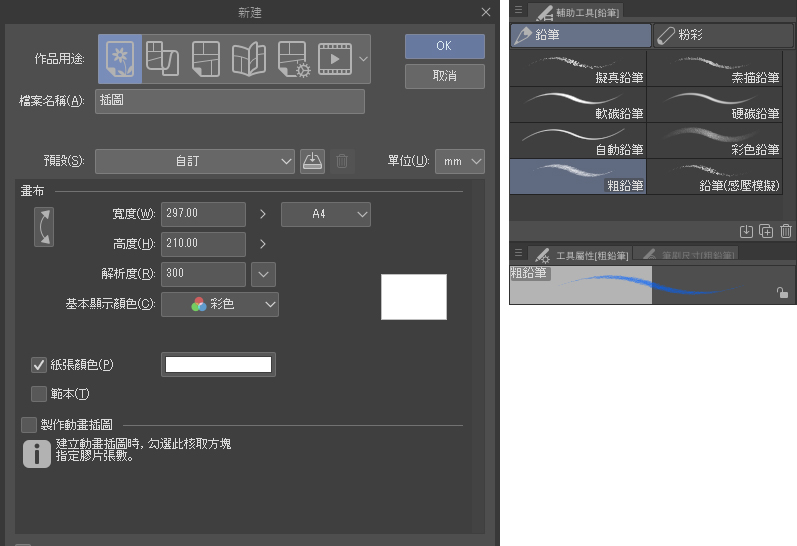
Create a new file in Clip Studio Paint ( File → New → A4 Canvas, Landscape, White ), then select the Pencil Tool Thick Pencil , set its color to blue, and use it to draw the sketch.
![]()
![]()
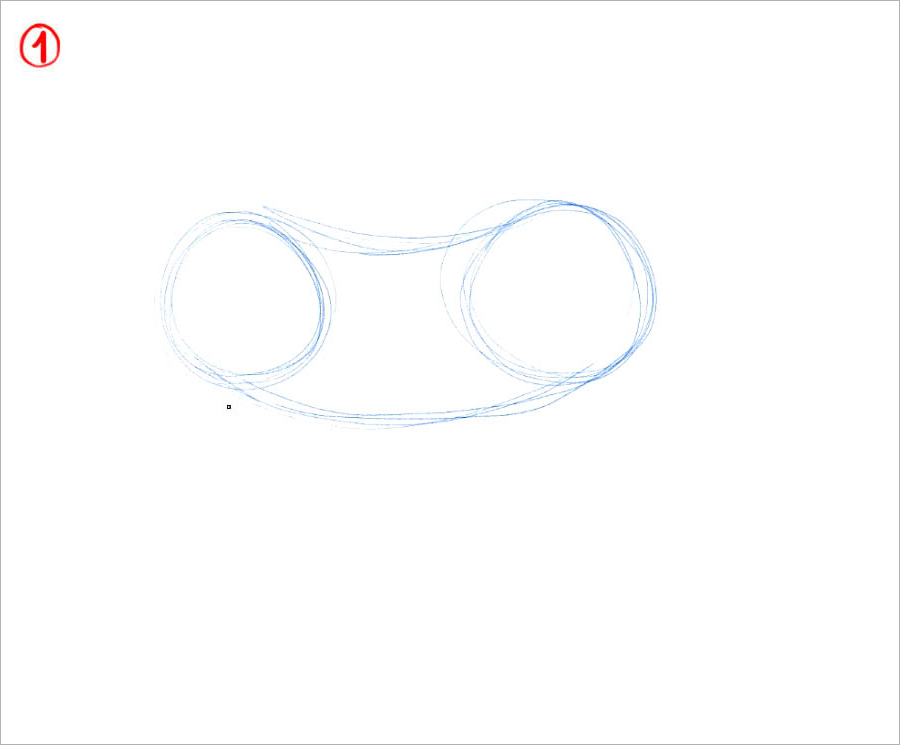
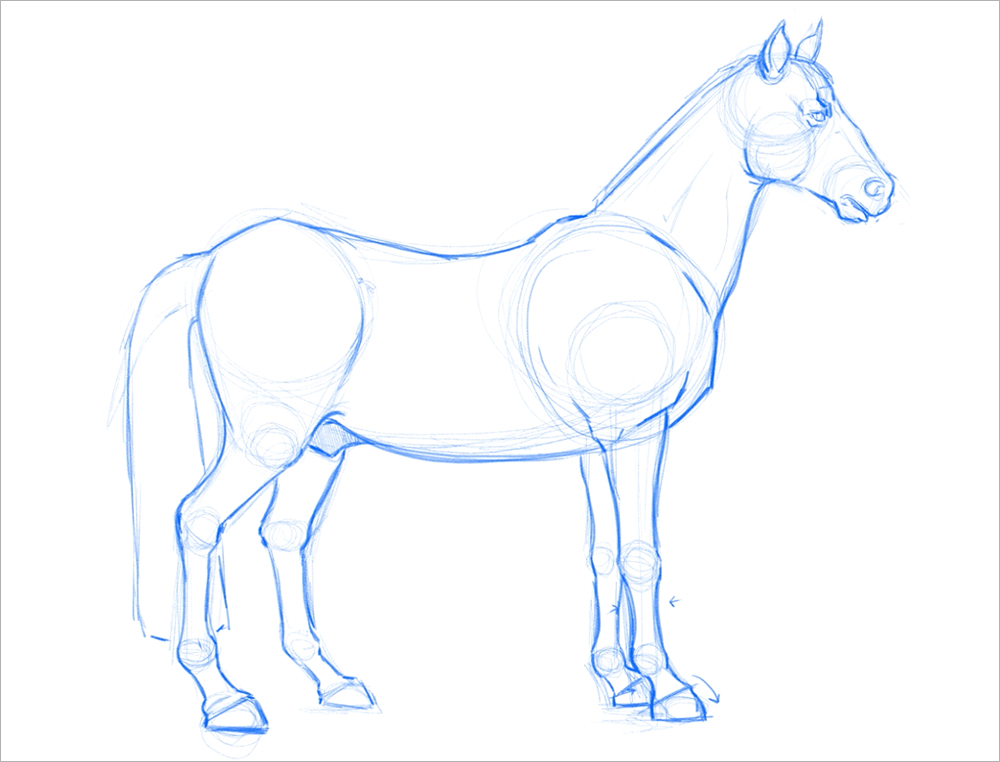
Next I’ll explain the drawing steps on the same layer. The first is a rough sketch, using simple shapes such as circles, ovals, rectangles, and triangles to make the sketches approximate the anatomy of the horse. Imagine a horse from the side, what is the most suitable shape?
First, as shown in Figure (1) below, draw two circles of almost the same size and connect them with two horizontal curved lines to draw a bean-like shape.
![]()
![]()
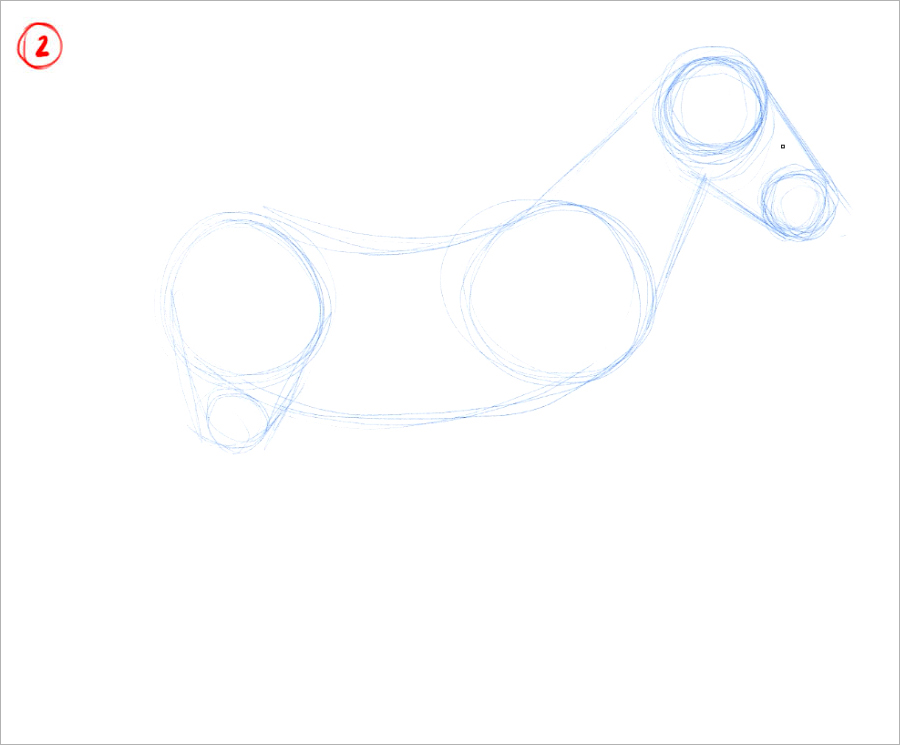
Next, draw two smaller circles for the head. As shown in Figure (2) below, use lines to connect two circles to describe the skull, and then use two straight lines to connect the body just drawn as the neck.
![]()
![]()
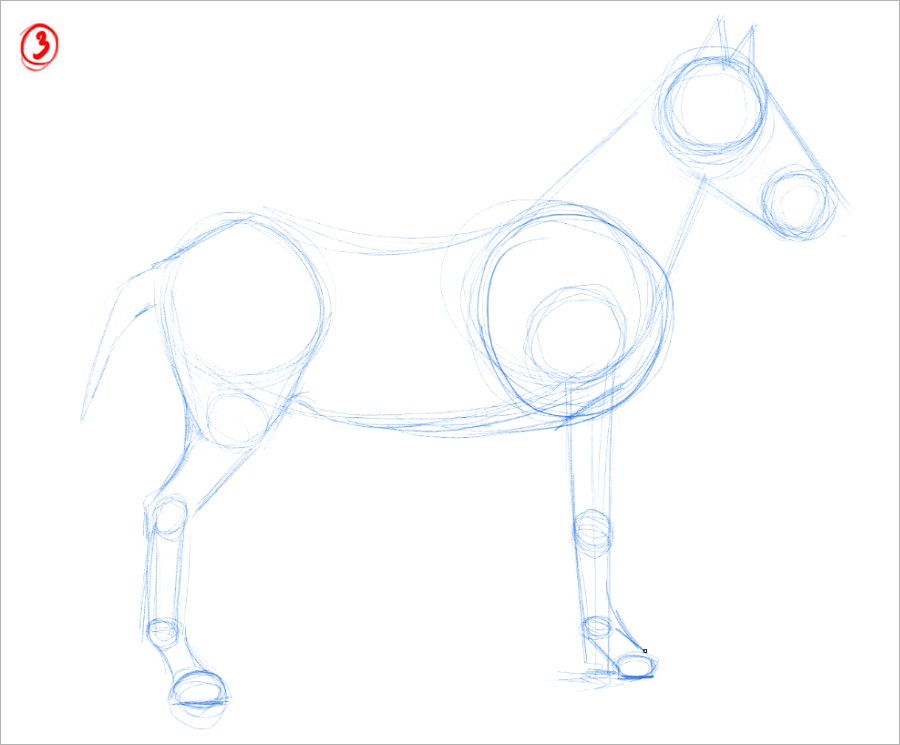
Now, focus on the legs. The front legs are relatively simple, as shown in Figure (3) below, just draw a few circles representing the joints and a rectangle connecting the body, and finally connect the oval representing the horseshoe with two diagonal lines.
![]()
![]()
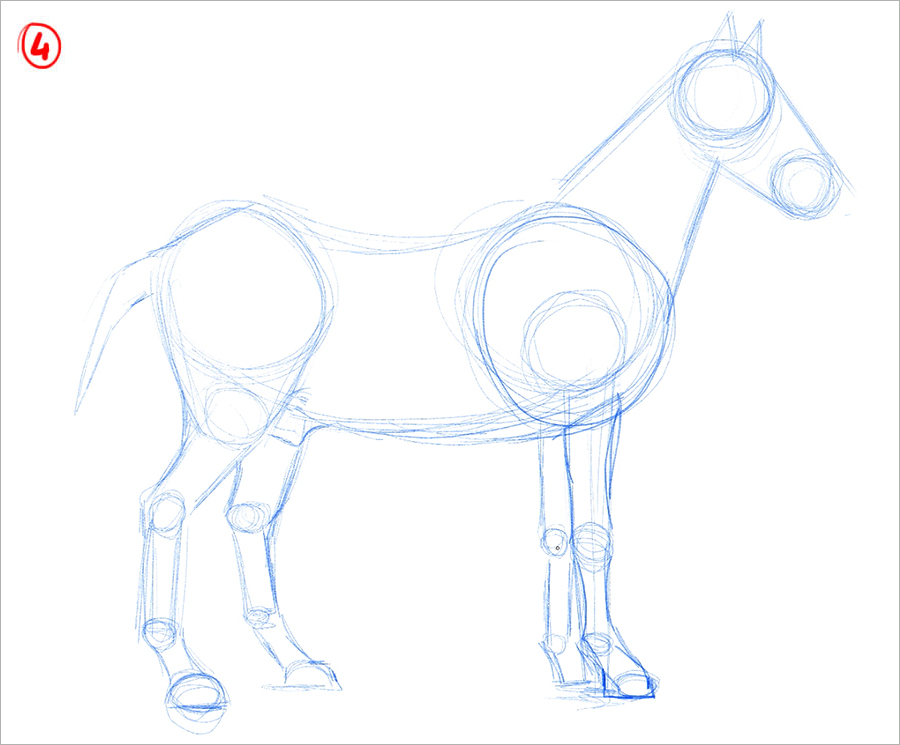
As for the hind legs, draw a small circle under the rear end of the horse to shape the thigh, and then draw the hind legs with circles and lines like the front legs, only this time there will be two sets of diagonal lines as shown in (4) below. Please confirm the picture below:
![]()
![]()
3. Draft
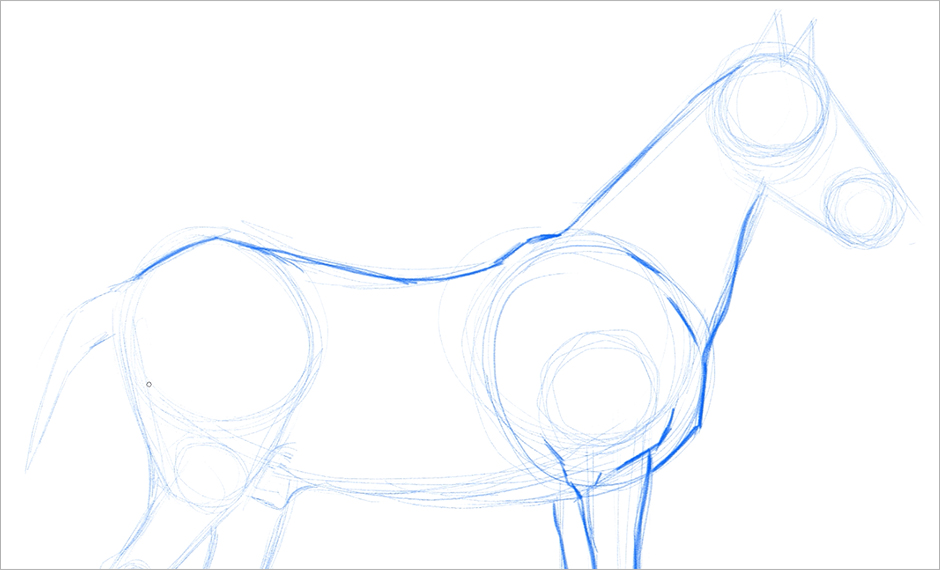
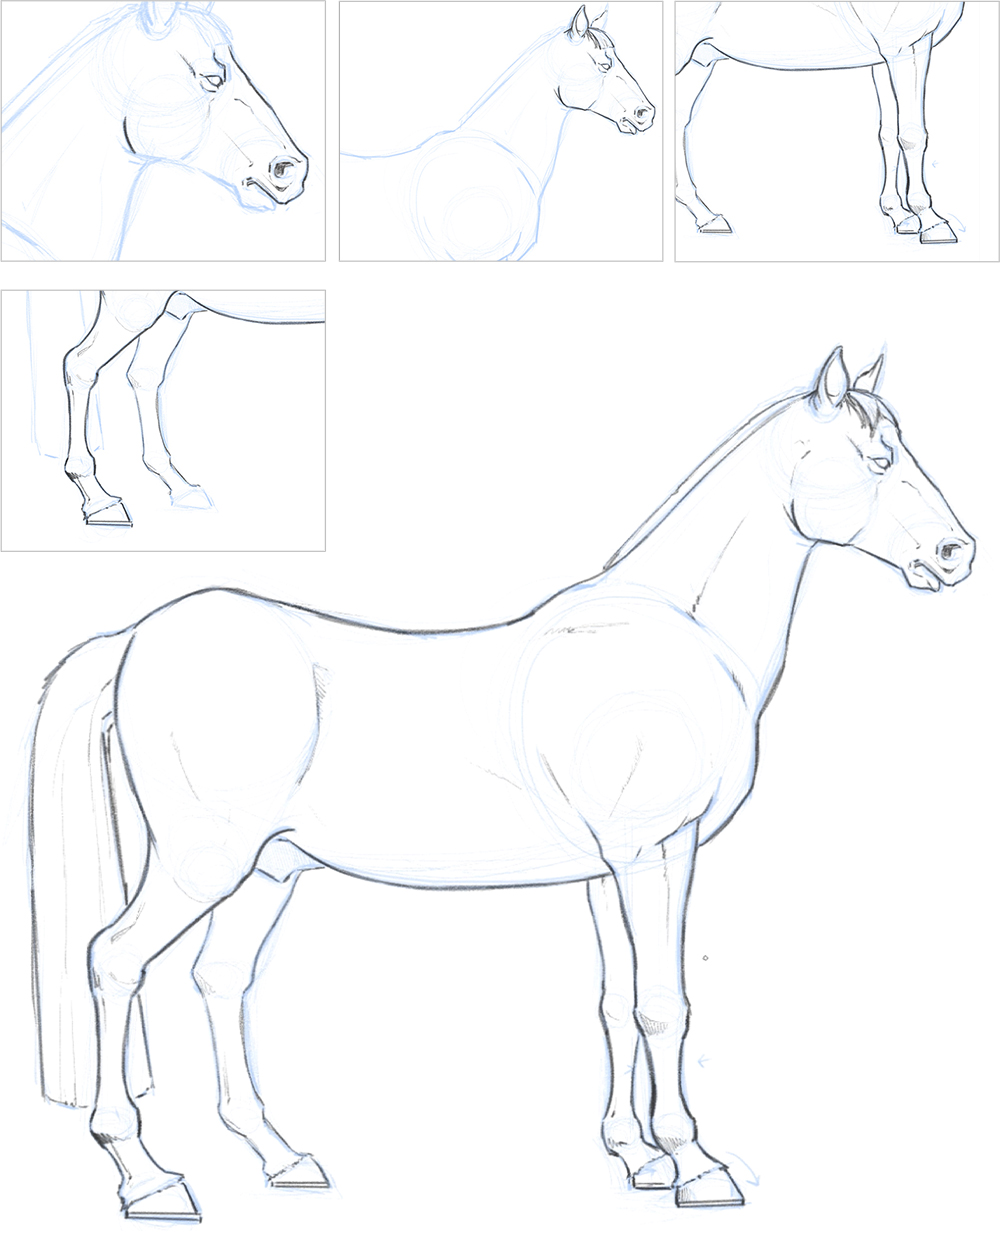
Once you’ve drawn the horse’s structure, you can combine all the previously drawn lines to complete the horse’s outline. In this step, you can increase the pencil pressure to more completely show the anatomy of each part.
![]()
![]()
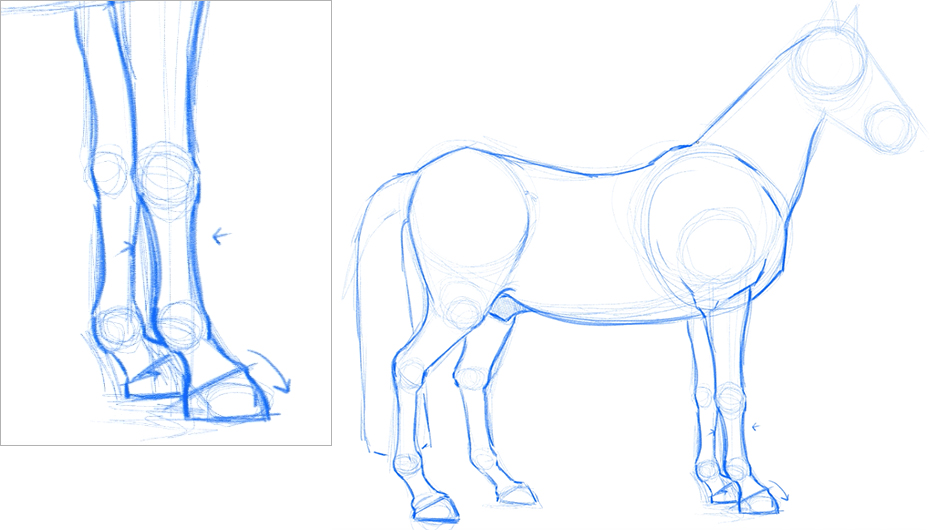
Now, we can take a closer look at the outline of the legs. Note that the straight lines drawn on the previous sketch must now be fine-tuned, bending slightly inward between the joints (as indicated by the arrows in the image below), and outward at the joints and hooves.
![]()
![]()
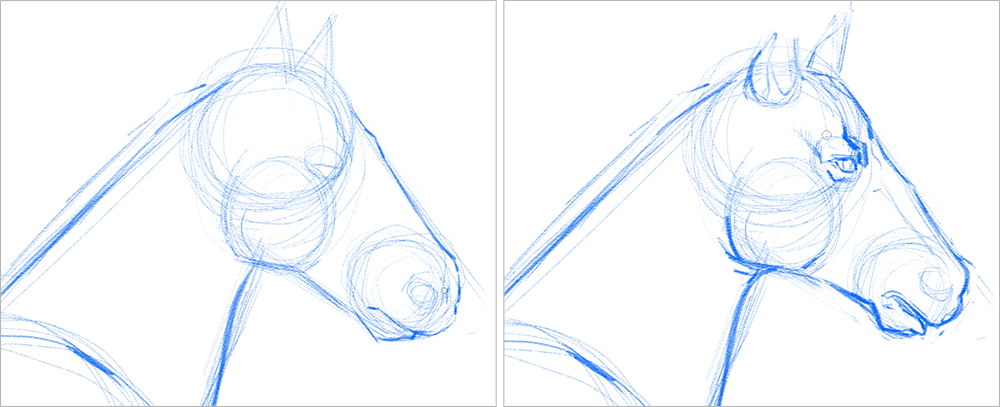
To fully render the skull structure, I’ll draw another circle below the largest circle to draw the most characteristic cheeks of the horse’s head; this is a key detail that gives the illustration realism. Next, I’ll draw the eyes, nose, and mouth in place. The reference templates you have at hand will be especially important during this step.
![]()
![]()
![]()
![]()
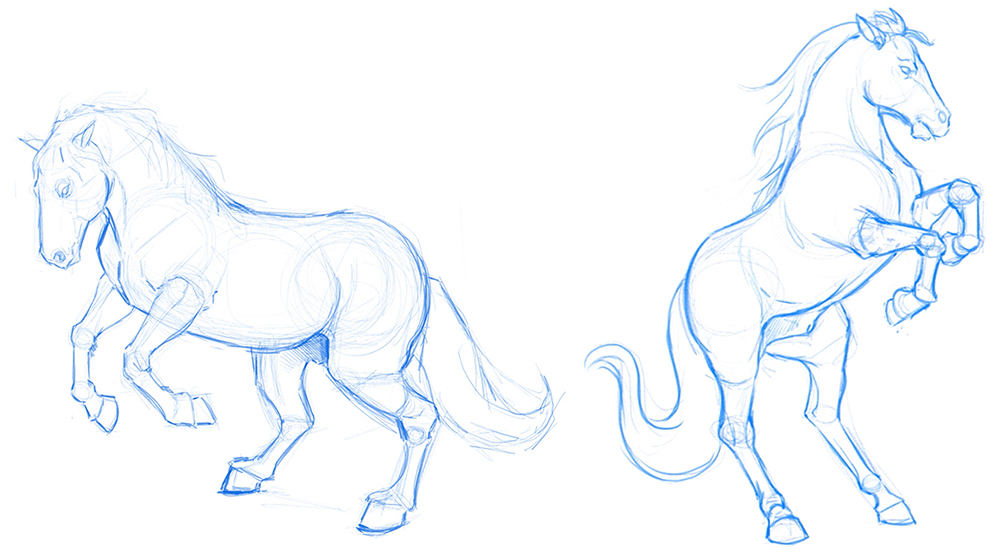
I chose this pose because it’s simple, straightforward, and suitable for teaching, but I don’t need to limit myself, so I’ve prepared two drafts of the pose so that you can have more reference options when drawing.
![]()
![]()
4. Line art
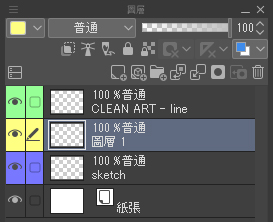
Now, once the draft is complete, it’s time to clean up the lines and finish the line art. Please reduce the opacity of the draft layer first, as shown in Figure (1), about 20% to 30%, and then click the button in Figure (2) to create a new layer. There is a trick here, you can quickly distinguish between different layers by changing the panel color of the layer as shown in Figure (3). Finally, as shown in Figure (4), double-click the layer name and rename it “clean art”, so that you can easily identify the cleaned layer.
![]()
![]()

It’s time to keep writing. Next I’ll use the draft as the base and paint with a darker color on a new layer, which will be the final shape (outline) of the illustration.
![]()
![]()
5. Preparation for coloring
The starting steps are the same as before. Create a new layer, rename it and change the layer’s panel color. In the demo, I’ll set the Layers panel to yellow.
Important: Drag the newly created layer between the two previously created layers (draft and line art), so that the line art layer is on the top layer.
![]()
![]()
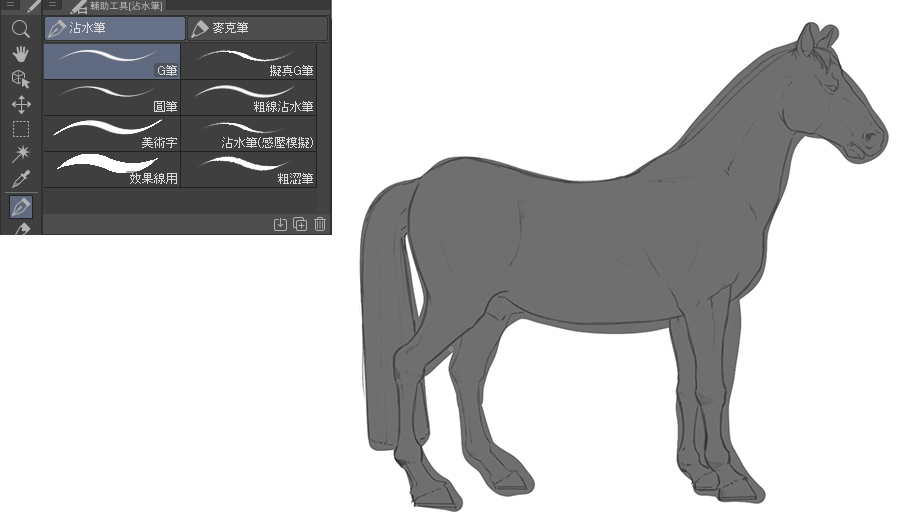
Color the horse after setting the G-Pen brush to light gray.
![]()
![]()
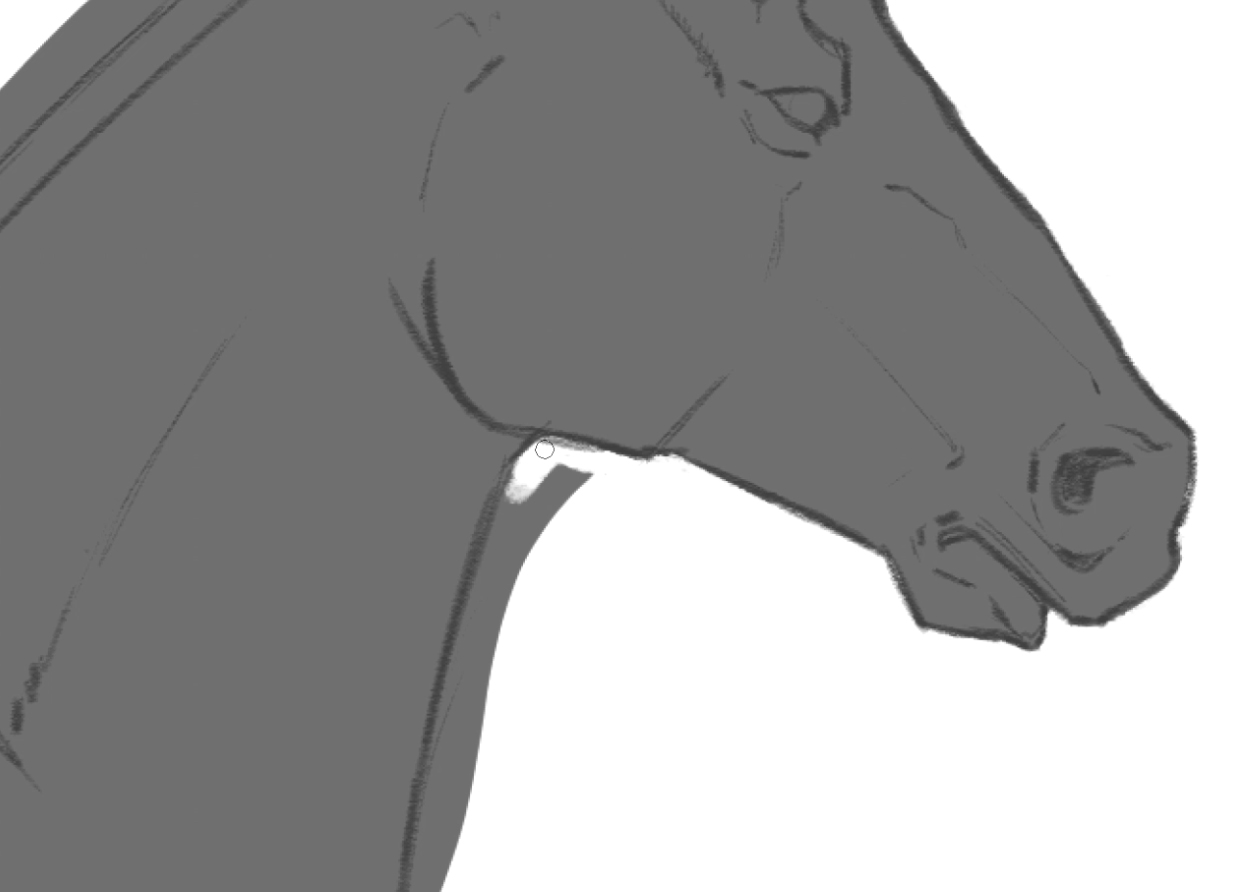
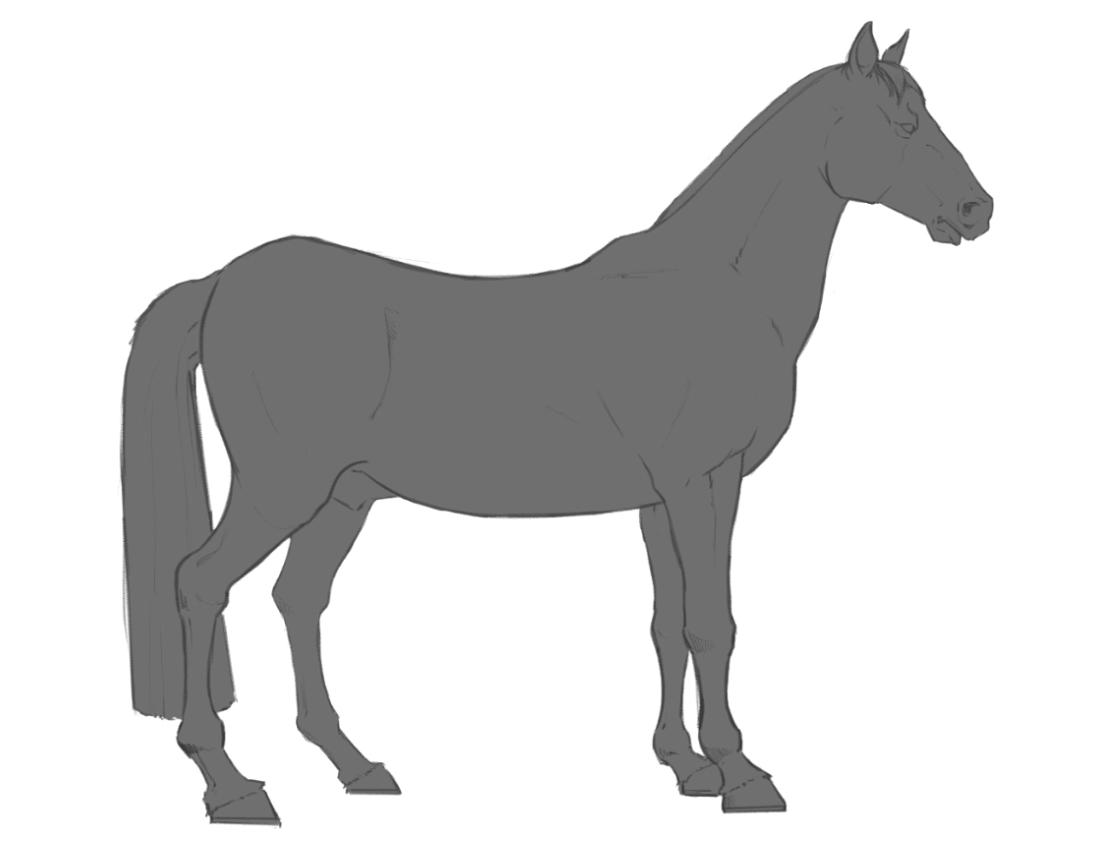
Then, use the eraser to carefully and patiently remove the color beyond the line art until it matches the overall line art outline.
![]()
![]()
![]()
![]()
6. Coloring
After finishing the pre-job, I will lock the transparent primitives before starting the next step, to ensure that the subsequent painting does not exceed the color range of the pre-job. This will make subsequent coloring easier and more efficient.
![]()
![]()
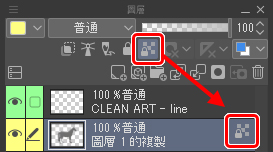
I’ll also duplicate the gray-filled layer (right-click on the layer → Duplicate Layer ), and I’ll explain why in step 7.
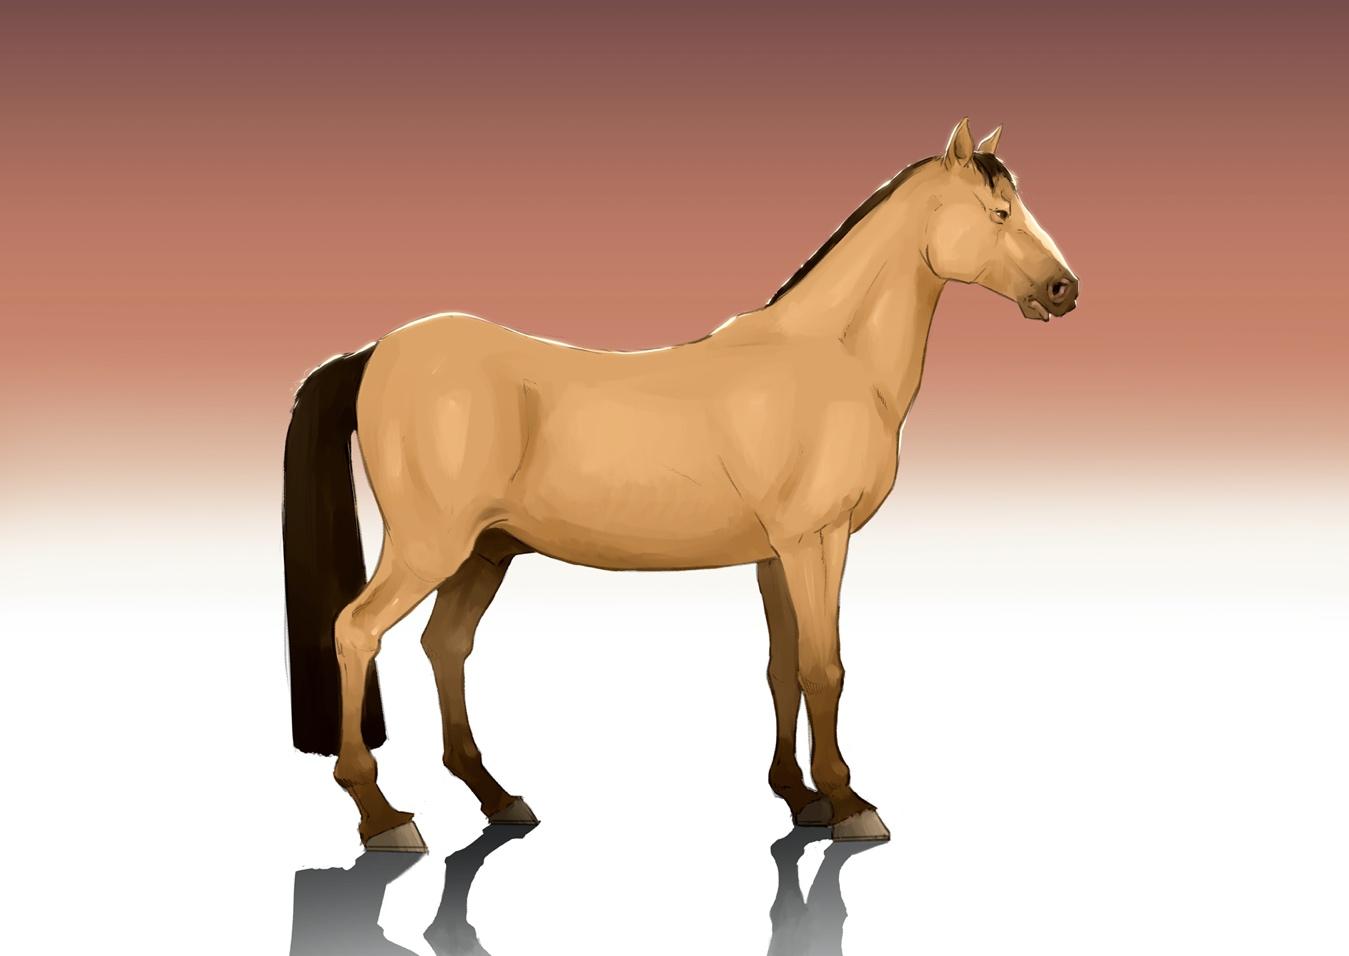
Now, choose your favorite coat color for the horse. I chose light earthy tones, you can also choose according to your own reference template. Use the paint bucket tool to fill in the color.
![]()
![]()
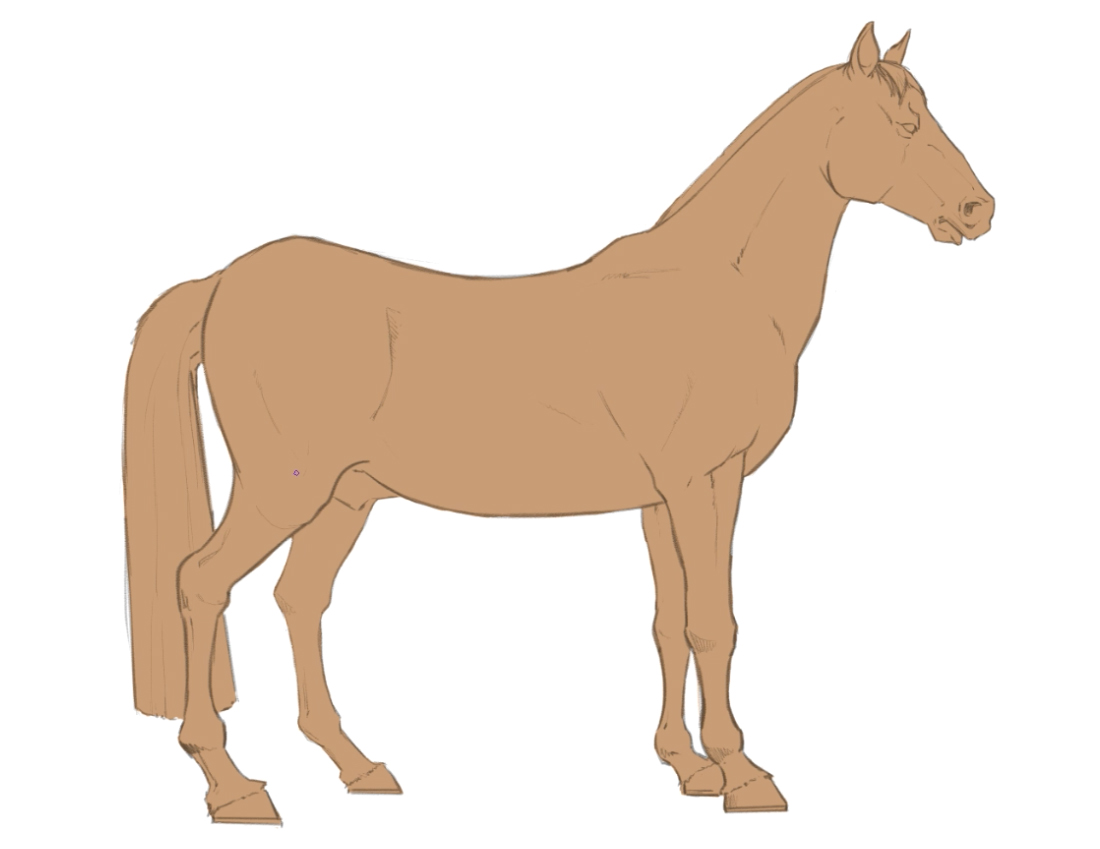
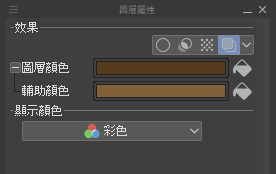
There is another way to change the color of the horse, which can be adjusted by clicking the Layer Color button in the Layer Properties panel.
![]()
![]()
When adding shading, I would recommend using a darker color than the fur, with a watercolor brush . Please refer to the picture below:
![]()
![]()
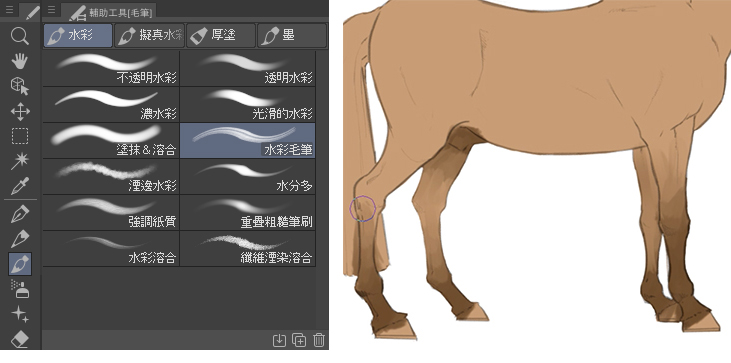
As you can see, I would start with the legs, followed by the muzzle and mane, the latter two being darker than the legs.
![]()
![]()
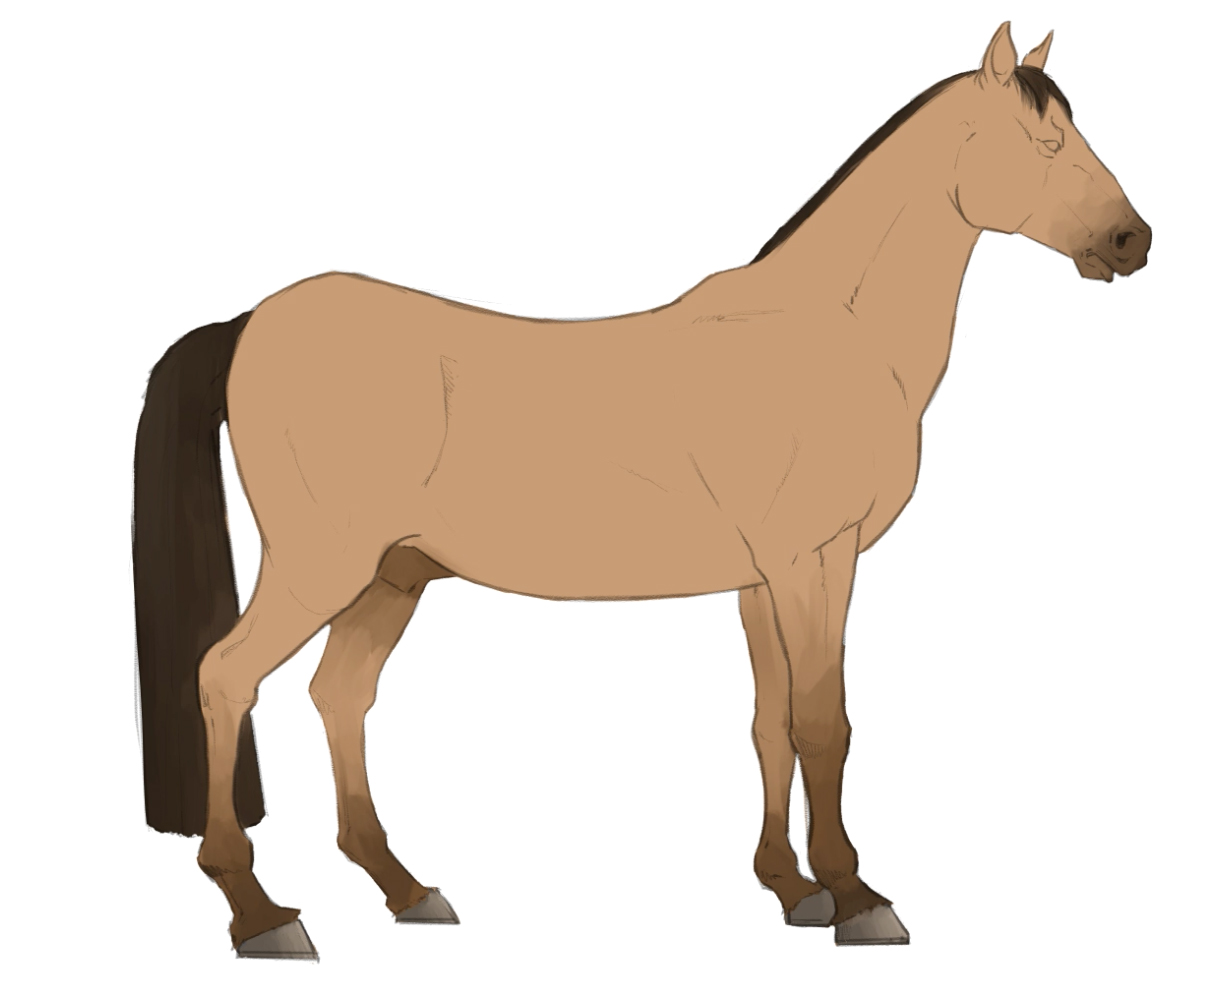
Also, I used brown to shade the entire horse, such as the legs. Take a little more time in this step to make sure you bring out the weight and depth with the right dark tones, especially when it comes to detailing the eyes and nose.
![]()
![]()

After the shadows are done, it’s time to add the highlights. Add flares where light reflects the most; for example, on the most prominent muscles: cheeks, neck, sides of the torso, and thigh muscles.
![]()
![]()
Then use the watercolor blend brush to blend and adjust the color of the highlights according to the shape of the shadow on the body.
![]()
![]()
7. Finished
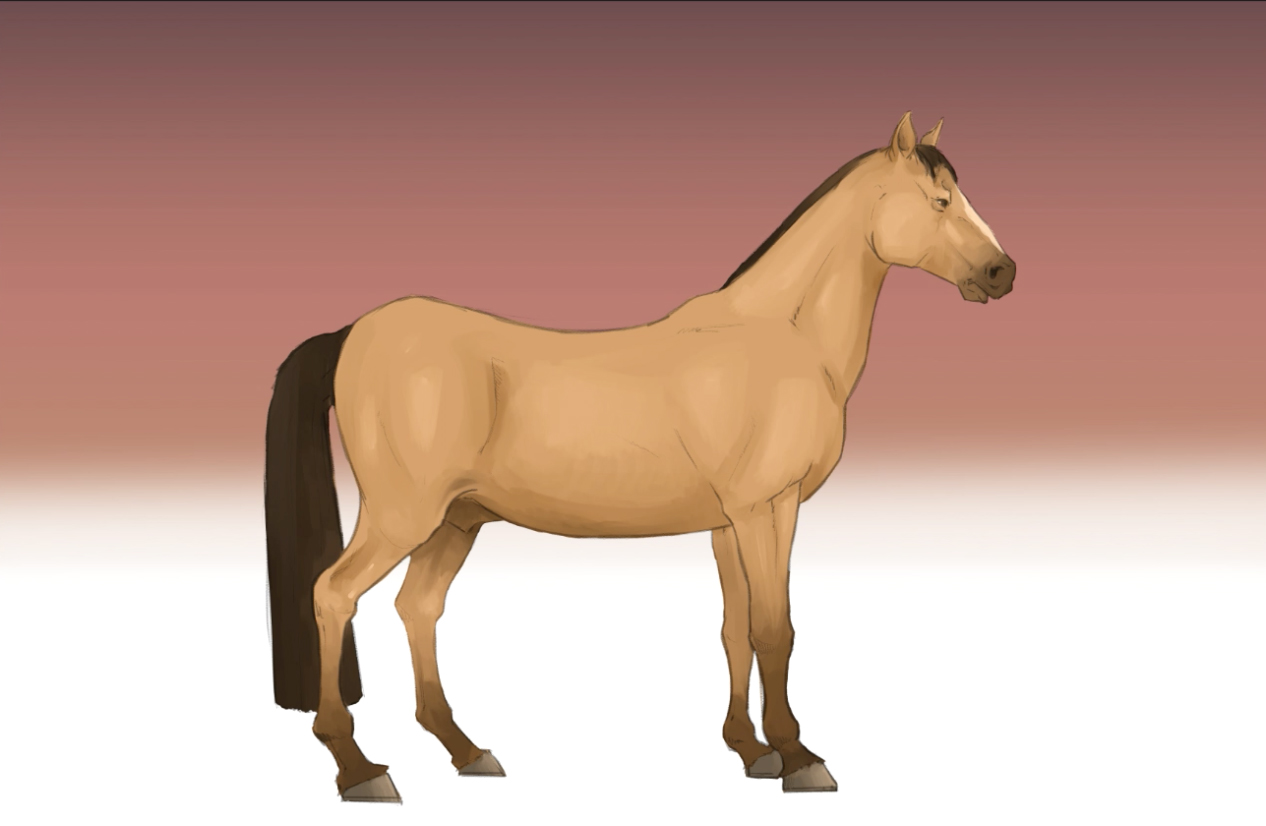
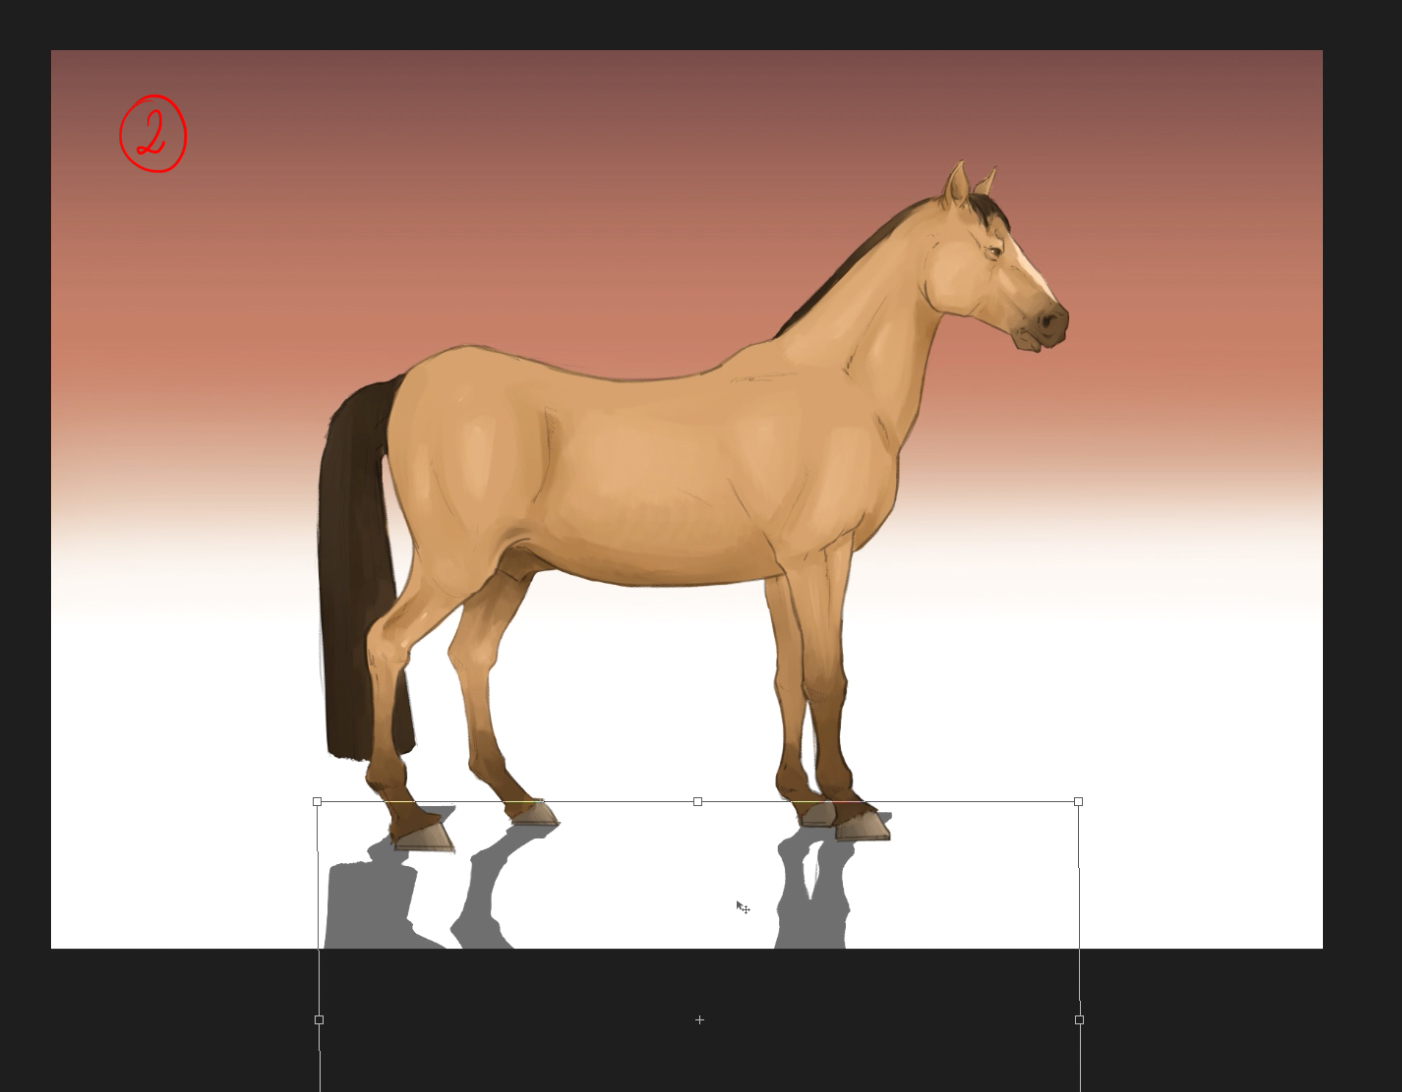
Now, let’s think about how to present the illustration. First create a new layer and place it below all the previously created layers. Using the Gradient Tool, paint vertically on the layer with the color that best accentuates the horse’s tones.
![]()
![]()
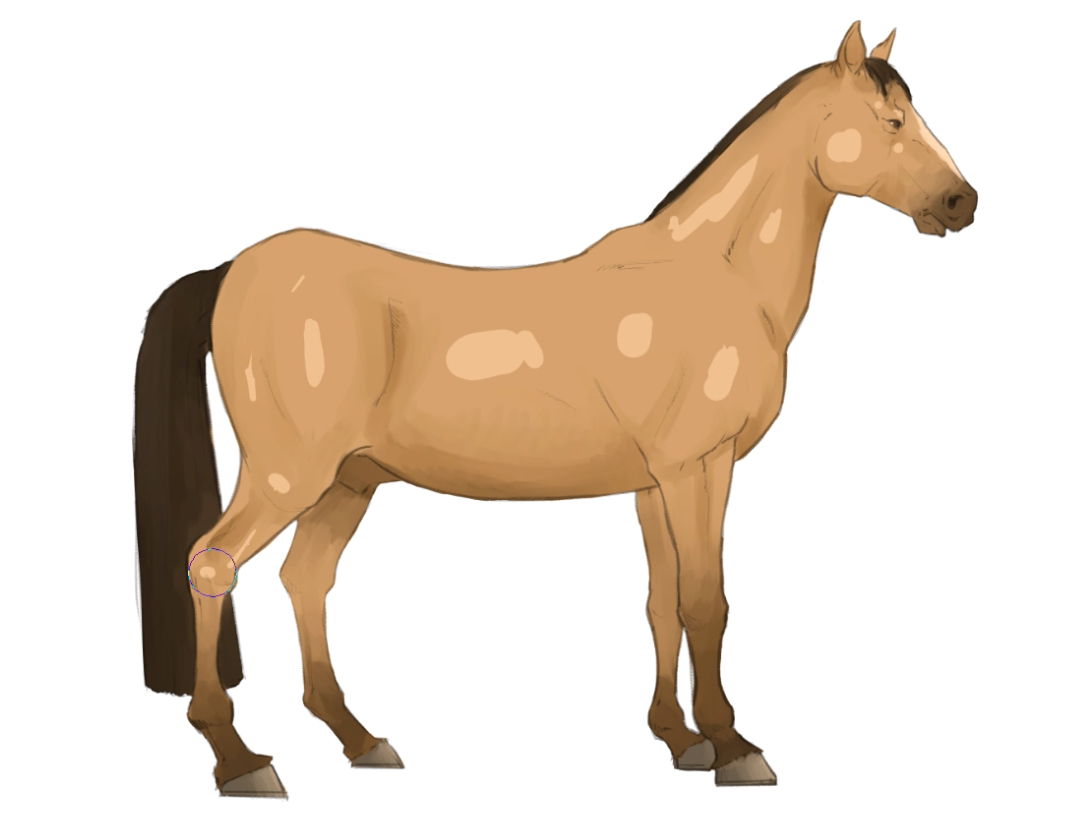
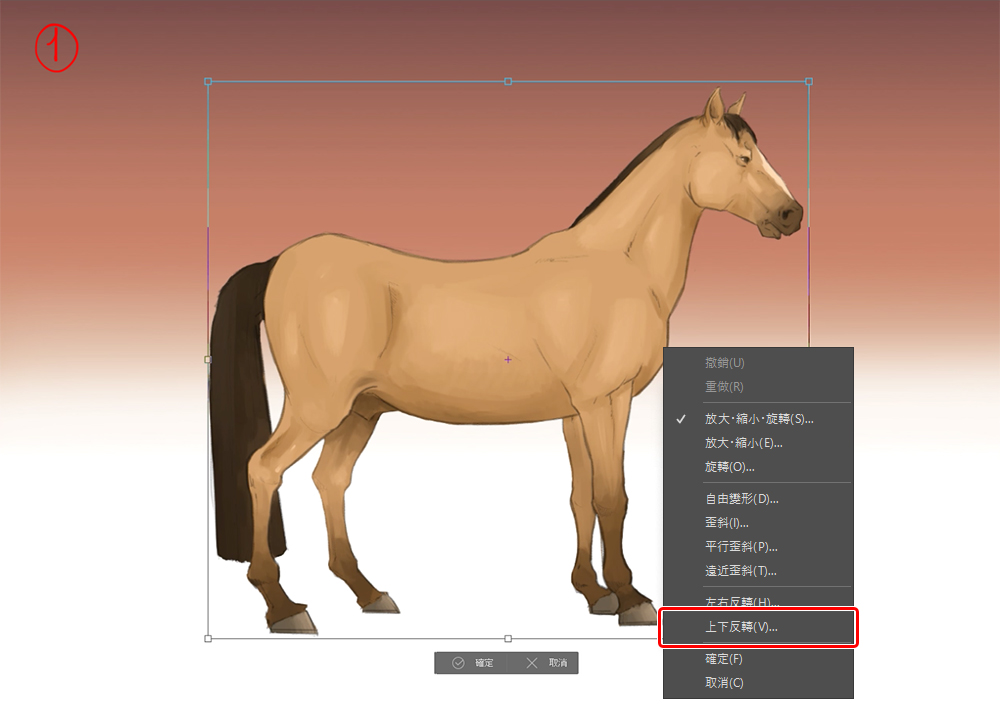
Next, I’ll add the reflections of the horses on the ground to add weight and realism to the image. This is where the gray layer copied in step 6 comes in handy. After selecting the layer, click Transform ( [Edit] menu → [Transform] ), and then select Upside Down (1).
![]()
![]()
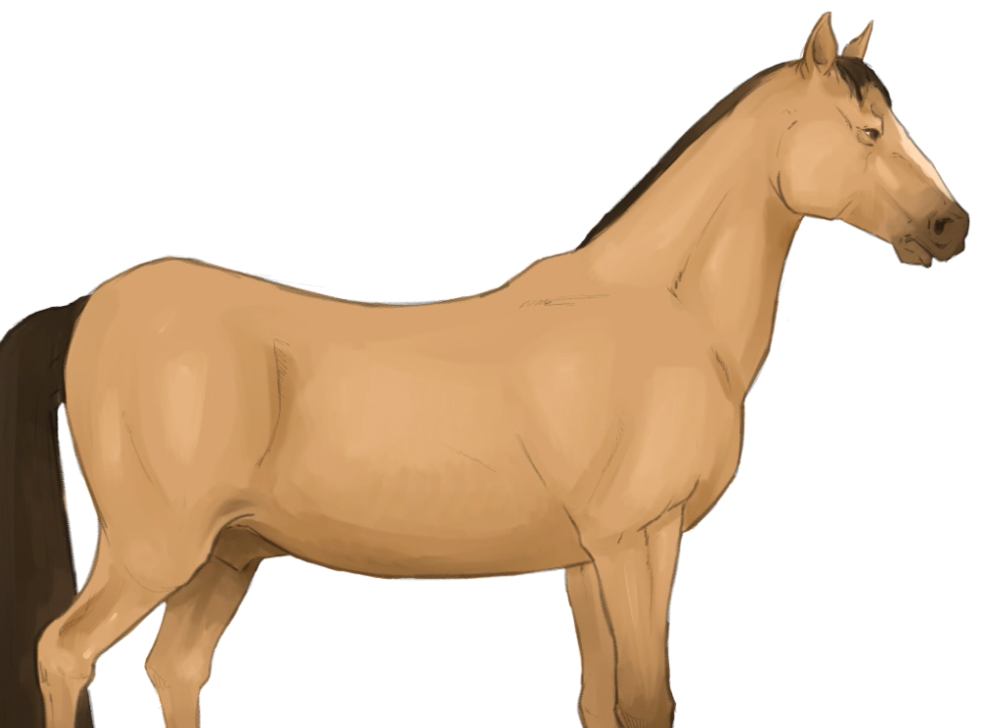
Then, adjust it to fit the shape of the legs as shown in (2) below.
![]()
![]()
Use the eraser to remove unwanted parts (3).
![]()
![]()
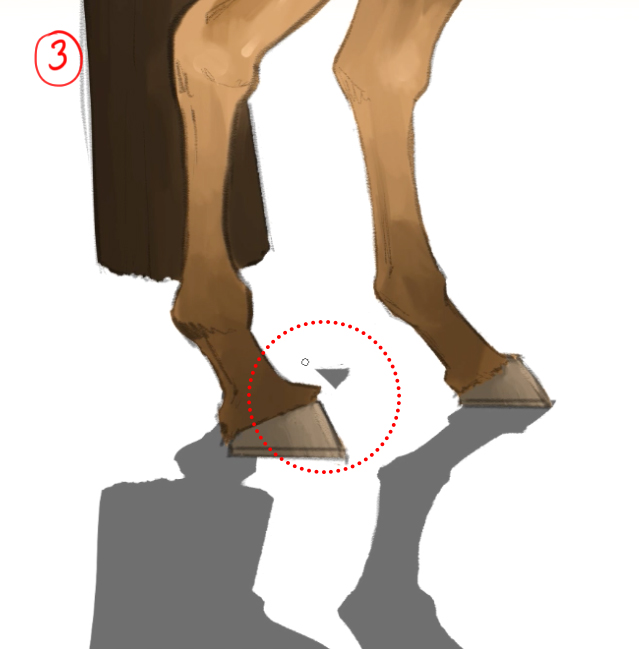
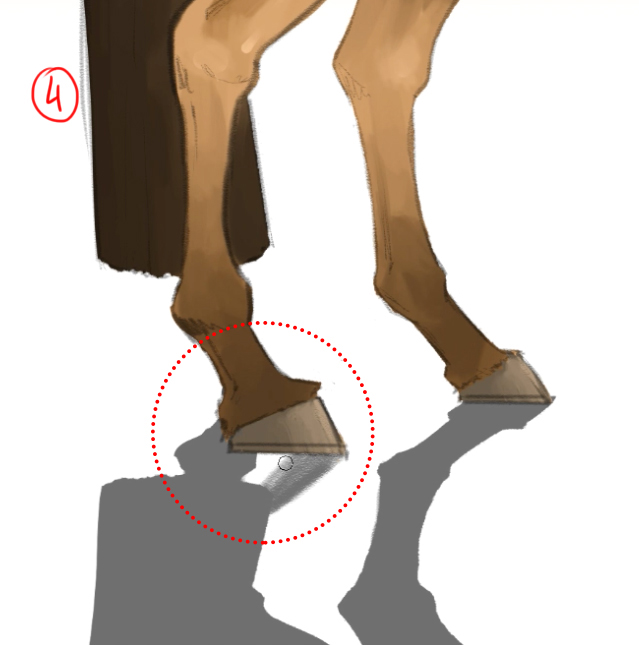
And add partial reflections where it doesn’t fit the overall scene, such as under the horse’s hoof (4).
![]()
![]()
To complete the shadow, I will use the Soft Eraser Tool and set it to a large size (800px), so that the bottommost reflection has a gradient effect as shown in the image below (5).
![]()
![]()
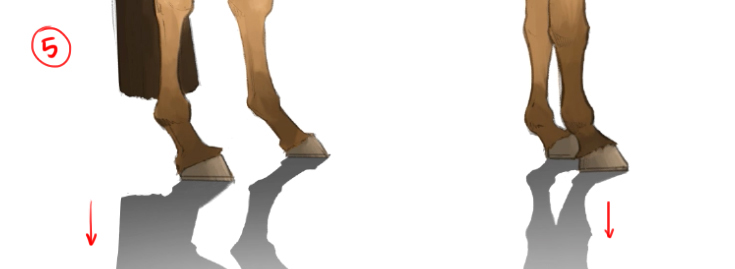
This is a handy trick that can be applied to illustrations of people, objects, or animals.
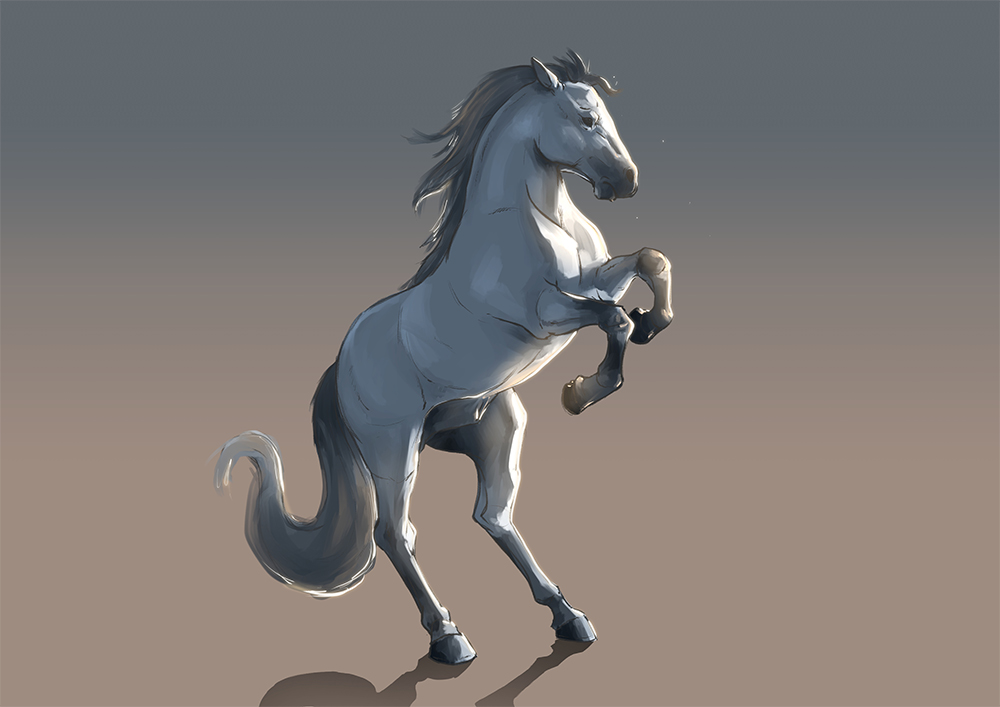
As a final tip in this instructable, I added a ray of light to the horse’s back and head, which gives an imposing, realistic effect. To do this, create a new layer above the “clean art” layer of the line art and draw lines along the top of the horse using a very light warm tone. Next, I’ll duplicate the layer and use a Gaussian Blur ( Filter→Gaussian Blur ) to simulate the reflection glow.
![]()
![]()
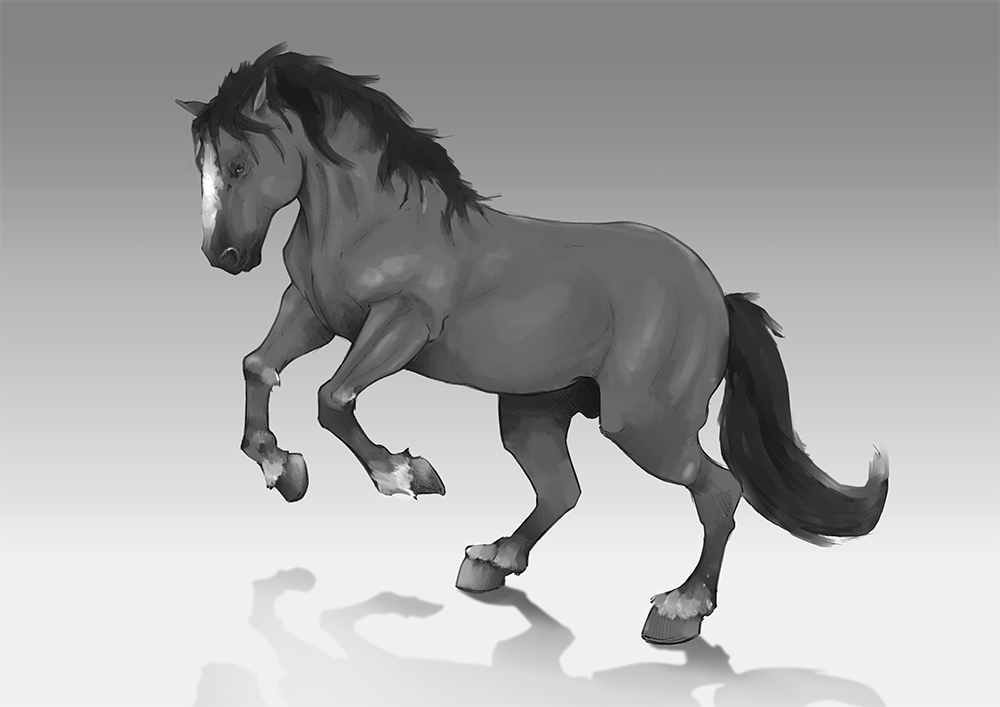
Let me demonstrate some horse poses from different angles, you can follow the steps in the previous demonstration to challenge the drawing. Please try to practice and see, don’t be afraid!
▼Animated GIF
![]()
![]()
![]()
![]()
▼Animated GIF
![]()
![]()
![]()
![]()
Hopefully my advice and this tutorial video will help you to draw a well-proportioned and vividly posed illustration of a horse.
At the end of the tutorial, please share with me on Instagram (@Danipuente_conceptart) the perfect horse illustration drawn after reading this tutorial, I look forward to seeing your work!
As always, it’s an honor to lift a brush for you all!