The Little Farmer accompanies you on a new adventure: learning to draw a horse ! Don’t be afraid, nothing could be simpler. Indeed, we provide you with a great tutorial , well detailed step by step, in a very simple way. The objective of our tutorials is to teach you how to draw while making you love drawing and have a good time during this activity.
Our drawing lessons are accessible to all , with small diagrams showing you the example, words and simplified lines while being very playful. This tutorial on how to draw the horse very easily is made for the little ones, but also the older ones, for complete beginners or confirmed artists, alone or accompanied by your best assets to put all the chances of success on your side.
If you prefer to work with a paper version then our drawing lessons are printable from the bottom of the page. It’s very simple and it allows you to do this course anytime and anywhere.
Learning how to make a horse in cartoon style and ultra cute can begin! Let yourself be surprised by the simplicity , speed and guaranteed results of this guide.
![]()
![]()

The material needed to make our adorable horse
- To start, you will need a paper support . It can be a simple and classic white sheet, a rigid Canson-type sheet, a colored sheet or any other medium that we hadn’t thought of. Be original!
- Then, for the lines of your drawing, several choices are available to you: a classic paper pencil, a criterium, a colored pencil, a marker of the color of your choice , chalk, charcoal, felt… .
- For coloring your big horse, all techniques are also valid: felt-tip pens, colored pencils, chalks, gouaches, water or oil paint…
- To have the best possible material you will need to have a pencil sharpener and an eraser .
- Don’t hesitate to spread out and put all the necessary materials within reach before you start drawing.
- Don’t put pressure on yourself , this is a simple activity, above all we want you to have a good time so let yourself go and let your creativity and imagination speak .
- The drawing lesson on the horse can now begin and gallop!
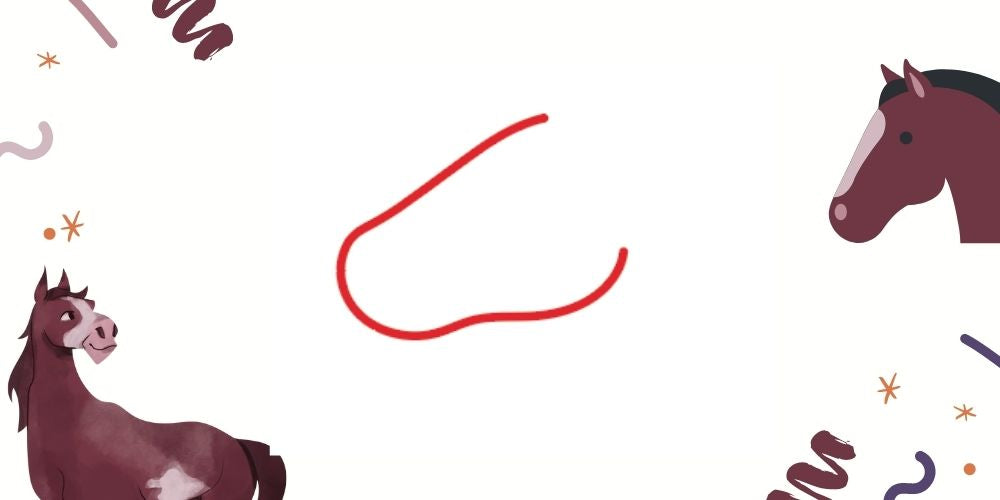
Step 1: The horse’s head
- The first step in being able to sketch a horse is to sketch the features of its head .
- Nothing could be simpler, start by drawing a slightly wobbly U -shape.
- For the most experienced designers you can try to draw the curves of the animal’s jaw, but if you can’t do it then don’t panic there is no problem.
![]()
![]()
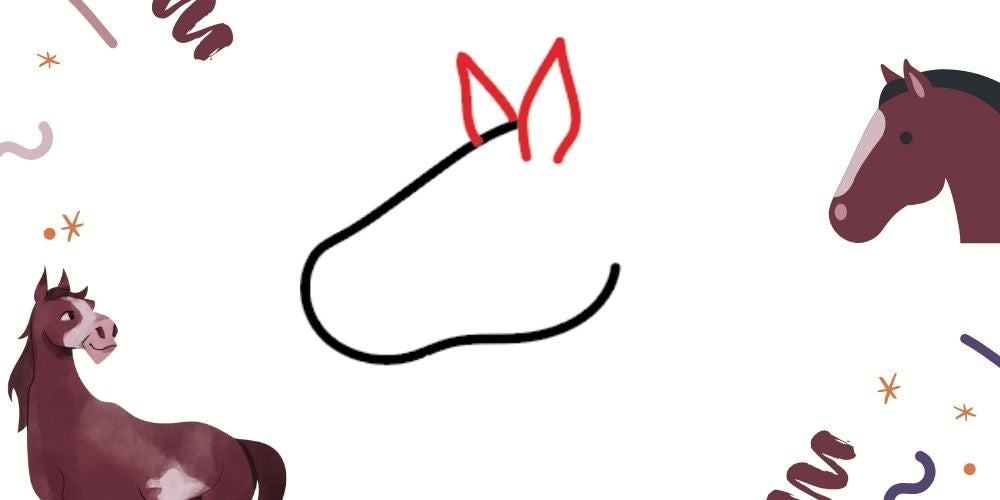
Step 2: The horse’s big ears
- The second step is to give hearing to our little horse.
- For this draw him ears , one on each side of his head.
- To make the sketches look like ears, draw two triangle shapes.
![]()
![]()
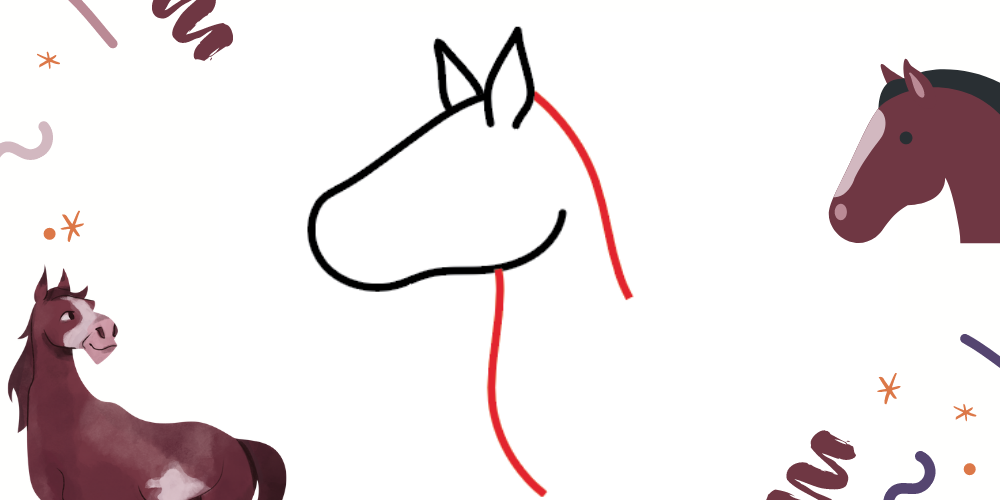
Step 3: The horse’s neck
- For this new step, we will proceed in two stages.
- First, we will draw a kind of curve below the animal’s jaw . The latter must start from the bottom of the head and go down by being just a little curved to represent the throat.
- A second line will start from the horse’s ears and go down just below its head.
- Please refer to the diagram below to clear any queries.
- By the way, if you don’t have exactly the same lines or if you don’t draw like us, there’s nothing to worry about, we’re sure the end result will be great!
![]()
![]()
Step 4: The horse’s face
- For this step we will focus on the face of the equine.
- For this we will draw eyes , nostrils and a mouth.
- For the eyes, you can draw a round or oval shape surmounted by a line which will represent the eyebrow of the animal.
- For the nostrils then, all you have to do is draw a slightly oval shape at the end of the head. You can draw a line just above it, but this step will not be necessary.
- Finally , the animal’s mouth will be a curved upward line that will make the animal smile.
![]()
![]()

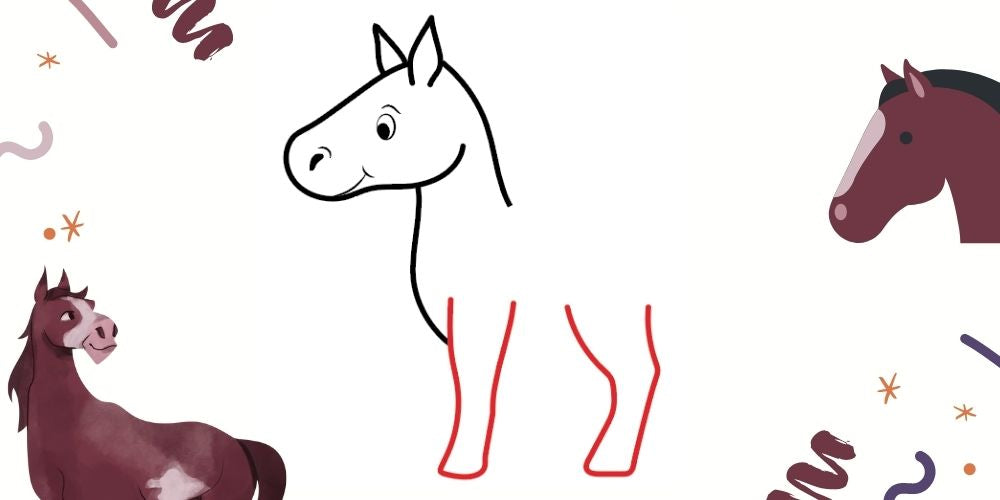
Step 5: The Horse’s Legs
- Now is the time to draw the large legs of the horse.
- You will start with the front leg, starting from the bottom of the animal’s neck where you will draw a sort of rectangle. Draw a line down, then the hoof to the right and finally go up to the height of the first line.
- For the hind leg follow the same path, but a few centimeters more to the right.
- Below is the result that Charles du Petit Fermier obtained, take inspiration from it:
![]()
![]()
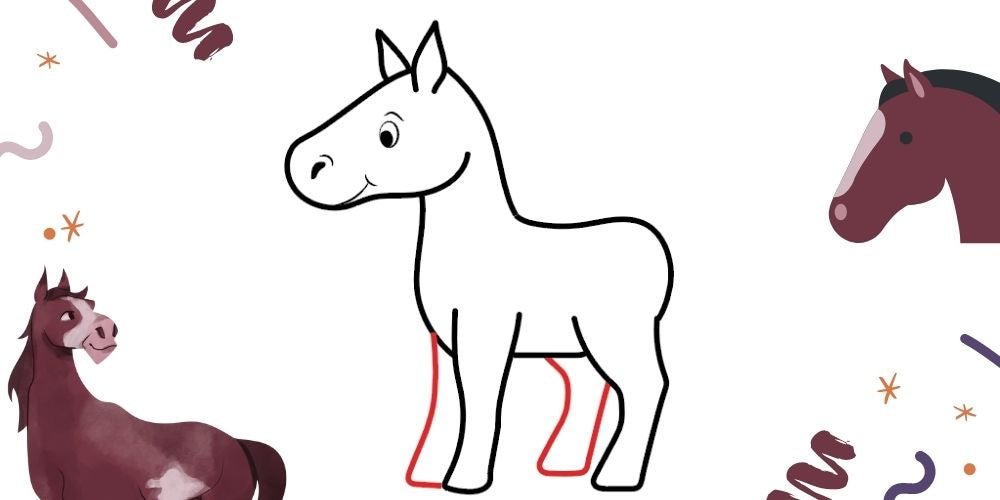
Step 6: The horse’s body
- It’s time to draw the body of our horse, this body will be divided into two points to achieve: the animal’s back and the animal’s belly.
- Let’s start by drawing its back , at the nape of the neck, you will continue to draw a horizontal line until it creates a shape of the back, then you can go down it by rounding it to draw the buttocks of the animal and that the line joins the beginning of the horse’s hind leg .
- Then you can simply trace the belly of the horse following the dynamics of the line of the neck and connecting the top of the two legs together.
![]()
![]()

Step 7: Hind Legs
- In the same way as you did the first pair of legs in the front, draw the back legs of the animal playing with perspective.
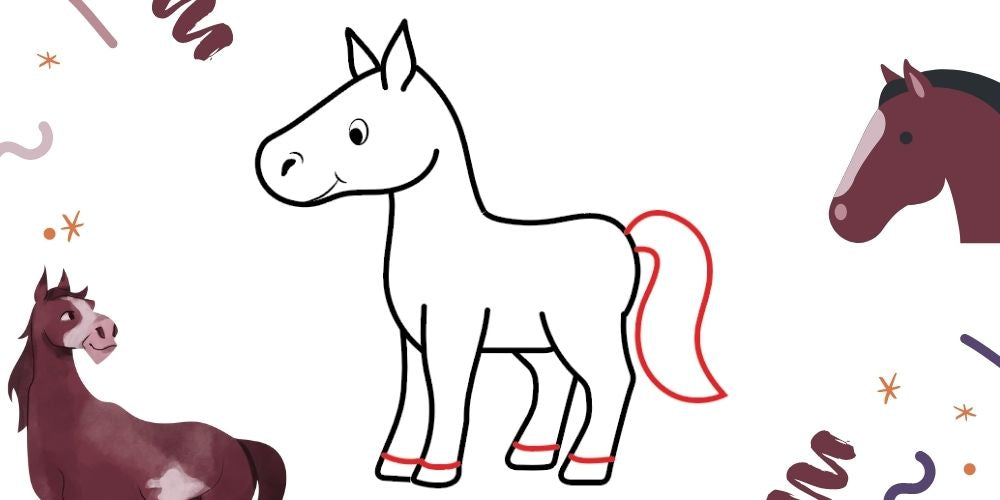
Step 8: Tail and Hooves
- Hold on we are almost at the end of our drawing class.
- As for the tail , you can draw it from the animal’s hindquarters, while forming an upside-down S or 2 shape.
- For the hooves, you will draw a line a few millimeters above each “foot” of the horse.
![]()
![]()
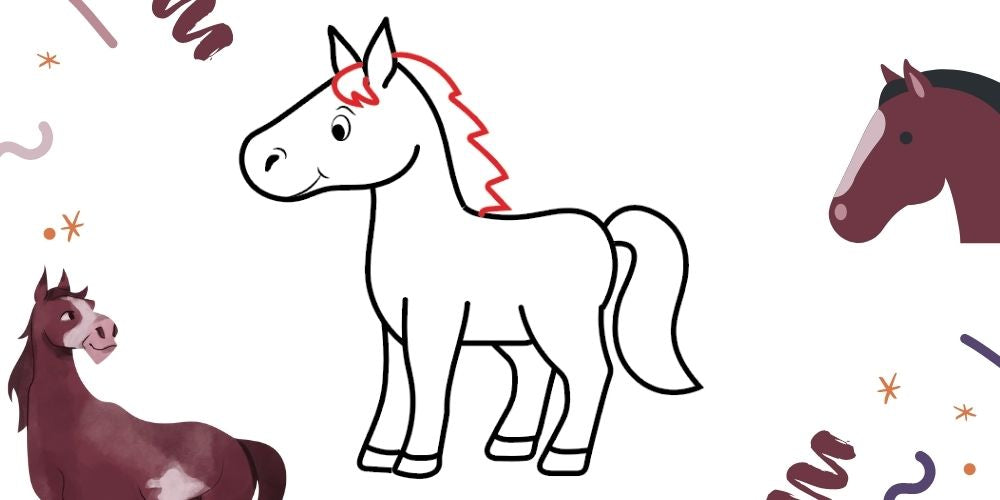
Step 9: The horse’s mane
- The horse’s mane is a crucial element.
- To make it well you will draw zigzags from the ears until the tuft reaches the level of the back.
- You will also draw a small wick, between the two ears, and always in the shape of zigzags or waves.
![]()
![]()
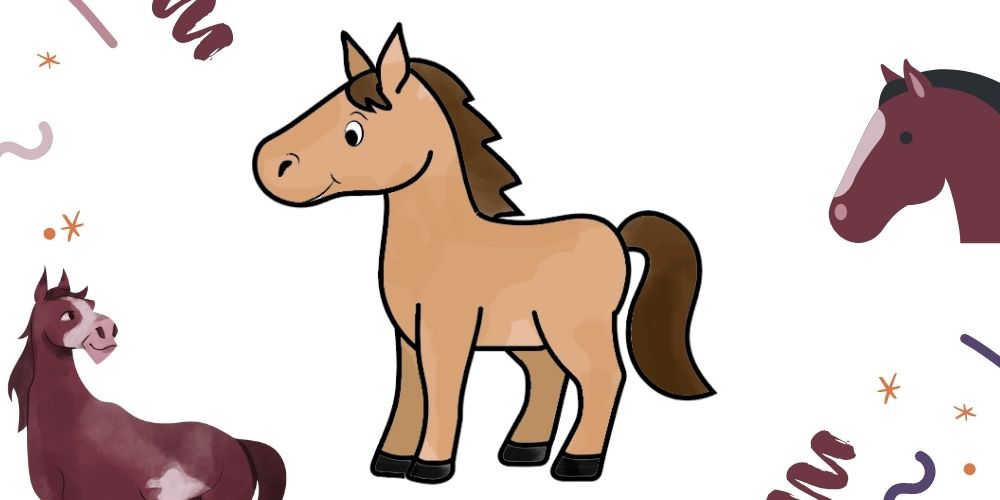
Step 10: Coloring the horse
- We are already at the last step of our tutorial.
- It’s time for you to let your imagination and creativity do the talking when it comes to coloring the animal.
- All the options, all the materials and all the colors are possible, the choice is yours!
- We have chosen to stay in sober shades and have opted for brown, dark brown and black!
- Our adorable horse has come to life, we are proud of our work and of you.
![]()
![]()
Congratulation ! You just learned how to draw a horse! The latter is particularly beautiful! We didn’t know you had already trained! Come and discover all of our drawing lessons on farm animals and try to succeed in another sketch
Conclusion of the drawing of the magnificent horse
The horse is one of the favorite animals of the population, it indeed represents full of values such as freedom, grace, the wild spirit …. It is also the dream of a lot of children who give them a passion from the youngest age. We offer you some interesting facts about the horse:
- The evil horse is called a ” stallion “, the female is called a ” mare “, and the young are called “colts” or “fillies”.
- A horse’s age can be estimated by studying its teeth . Besides, a horse can live up to 30 years, the average for a domestic horse is 25 years . Note that the oldest horse lived 62 years!
- Horses are herbivores , they feed on all kinds of products from the earth, we can notably mention hay. To be able to feed it has very large teeth which even take up more space than its brain.
- There would be 60 million horses on earth with more than 300 breeds .
- Horses are not made to live alone, they are indeed part of herds . The horse, whether domestic or wild, needs companions to feel safe and to be happy. Moreover in the group one of the horses will always remain awake when the others sleep to stand guard.
- The horse has an absolutely fascinating heart rate , as it breathes four times a minute when at rest.
- The oldest breed of horse dates back to 4,500 years ago.
- The horse would have a better memory than the elephant, studies are in progress.
Before leaving, we give you some advice to make your next drawings a success.
The whole Little Farmer team hopes you enjoyed this tutorial on how to draw a Horse. We also hope that you are satisfied with your result … if this is not the case we are going to give you some tips here that could help you better succeed in your next artistic challenges.
- Before starting the actual drawing activity, clear your mind and don’t worry about whether or not you will pass our course. Our tutorials are very simplistic, more pressure will only increase the chances of failure and having a bad time. So be zen , you are here to have fun , there will be no judgement.
- Show imagination and creativity , it is these two elements that will make your drawing successful and original. There are no predefined rules in the drawing, it’s up to you to base your rules and create and assume your style.
- The quality of your material is necessary so as not to have runny lines, not clean and which could spoil your whole drawing. So take the time to cut your leads and check the condition and cleanliness of your equipment.
- We advise you to trace the first lines of the drawing in pencil or criterium, and not to press on the lead. You need to be able to erase bad sketches easily and make them disappear.
- If you want to make a more realistic drawing then you can work on the shadows and shades of the horse by relying on the basic depth.
- If, on the other hand, you want a result that is even more manga or cartoon-inspired and even more kawaii , we suggest you accentuate and magnify the contours of your drawing.
So what will be your next work of art?
We are delighted to have seen you on this drawing course and we hope to see you again . Did you know that we have a whole collection of tutorials to teach you different elements of fauna and flora related to the farm?
Our drawing guides are always so simple, effective and fun, so why not take on new challenges? Passing by the too cute cat, or the very slow snail, the pretty cow and its horns or a beautiful red rose to offer? It’s up to you.