Hair is one of my five favorite parts to draw and color, and so many people want me to do this instructable. I tried to include a wealth of information in the teaching and managed to make the video content look interesting while containing a lot of skills!
There are no hard and fast rules in this teaching, just sharing my drawing method with you, I hope you can enjoy it.
Use reference materials
It can be quite difficult to draw something without knowing what it looks like in real life. It is recommended that you search for photos first every time you encounter a bottleneck! Don’t just search for animation works, but also real people.
Where are you looking for? You can find it in many places, such as Pinterest, Instagram, DeviantArt, etc.! If you think this is cheating, plagiarism or plagiarism, you are wrong. Every great artist will use reference materials, and you should use them more!
shape and volume
Hair and eyes in animation are often used to express emotions and character personalities, so these parts are often given more detail than in real life. But since this is a drawing creation, there are really no complicated rules! Just follow your hand and practice your creativity. Check out more animations you like. How did those hairstyles make you feel?
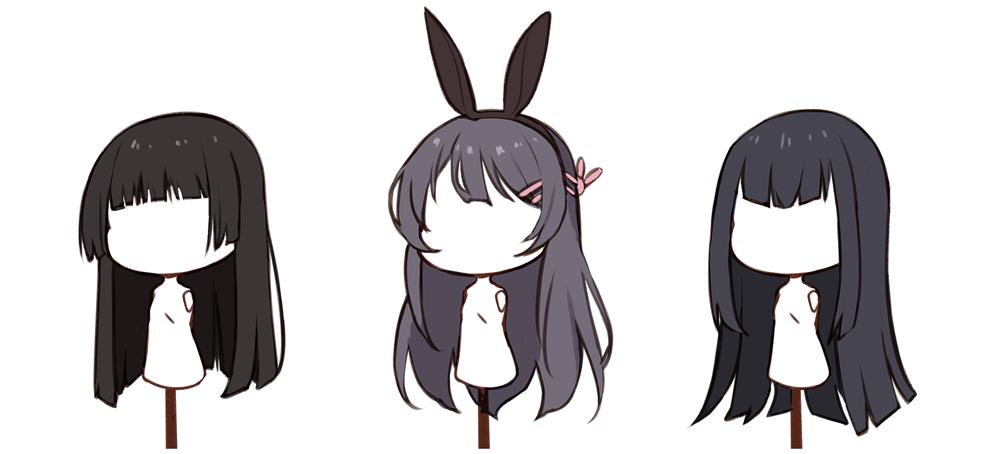
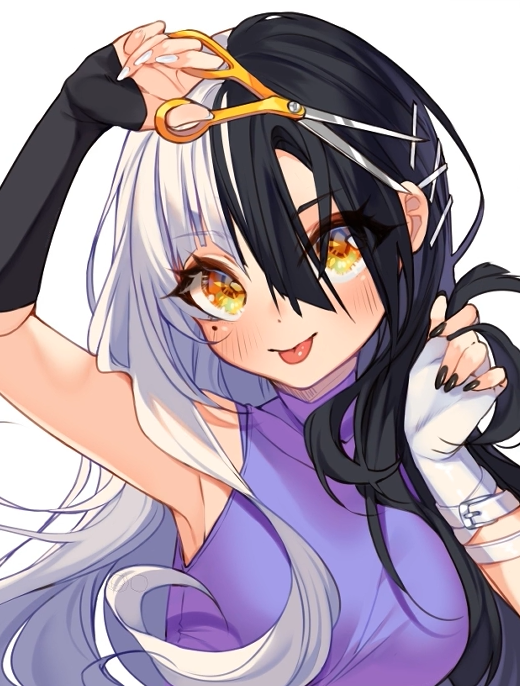
Straight black hair feels serious
![]()
![]()
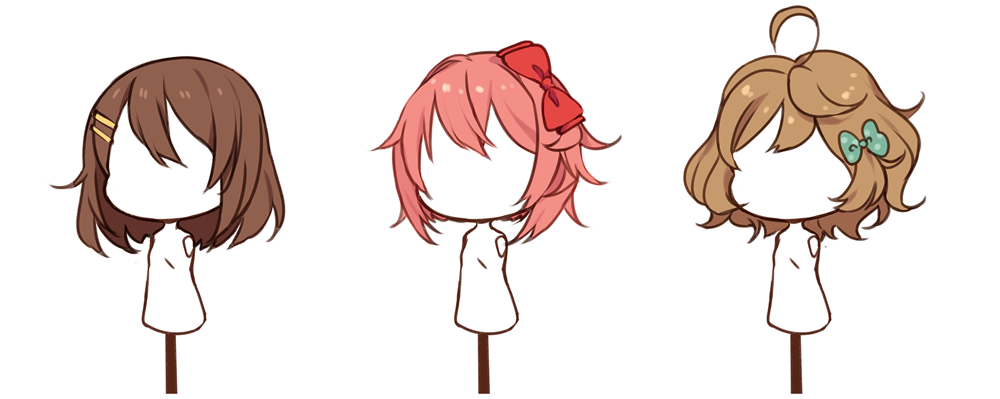
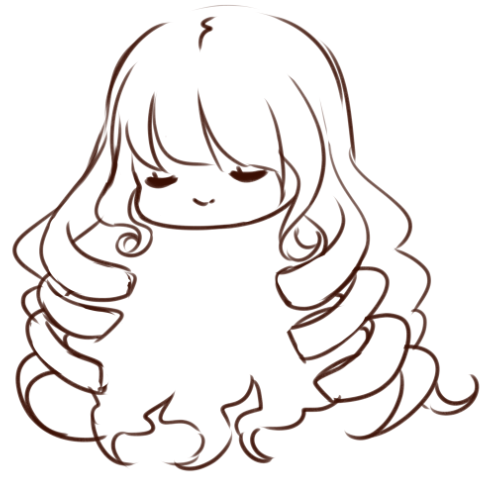
Fluffy curls make people feel warm and approachable!
![]()
![]()
drafting skills
When I start to draw hair, I only think about the outline, I don’t pay too much attention to the details, and the overall shape is all that matters when I sketch.
If you don’t know where the hair on your head is going, start with the skull and add a little thickness. A simple line in the center should be enough to show where the hair is going. Once you’ve figured out where the hair is going, you can make the top of the head a bit more complicated.
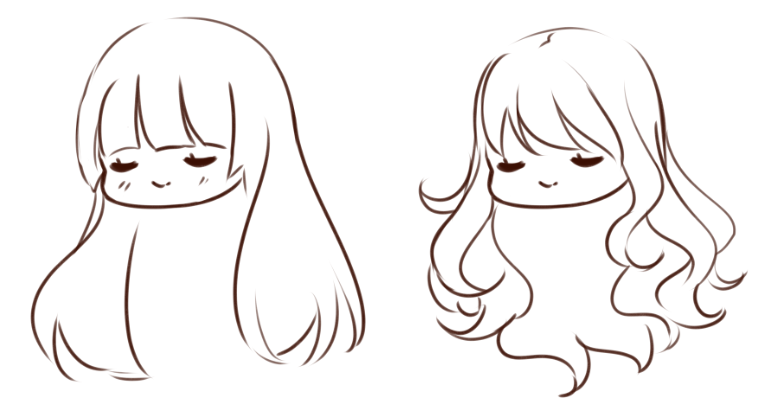
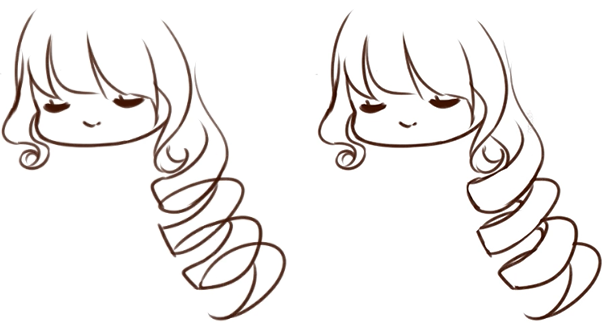
Also, it’s great to draw with an S-curve. Even if the hair is straight, it can be drawn in an open long S shape for a light, flowing look. When drawing wavy curls, the S-curve becomes even more pronounced!
![]()
![]()
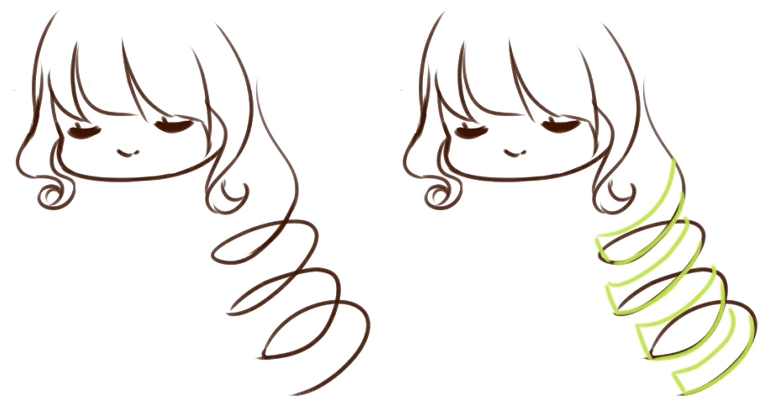
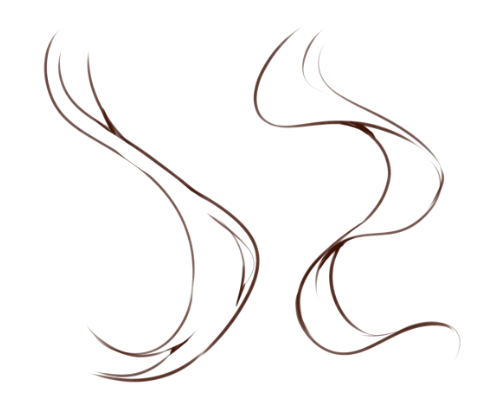
A different technique is used when drawing standard curls. I would start by drawing a spring and then hammer out the part facing the outside. Then duplicate this line shape again.
![]()
![]()
After that I erase the lines at the back and connect them so that I can draw a full curl!
![]()
![]()
You don’t need to do this for every lock of hair (but you can do it if you like!), you only need to draw a few locks to express the feeling you want, and the back part can be simply drawn in a simple shape. it is good.
![]()
![]()
If it doesn’t look right, just delete it and repaint it, don’t be afraid. Even if it takes a lot of time, a little extra effort on this part to find the right feeling will definitely pay off in the end.
Another important technique is to draw with long lines, not short strokes. This will make your pictures look more delicate, and it will not hurt your wrists!
Take a break if you start to feel confused and find some new references to relax your eyes. Also don’t forget to have references open when you draw, it will help you a lot.
About Line Art
When I am officially drawing, I will not redraw the line draft, but will choose to revise the draft and use it cleanly.
By “cleaning” I mean that when the need arises I will erase the messy line and redraw it again, giving it a different feel than a perfectly clean line. This allows me to relax a bit while painting and not worry too much about the details.
You don’t have to keep trying to zoom in and stick your face on the screen just to make sure the lines are perfect! And to be honest, you’re probably the only one who will find your little mistakes.
You can use the same brushes you use for your sketches to draw your line art, but it all depends on how you want to draw. I highly recommend you to use the standard brushes, or go to CLIP STUDIO ASSET. There are a lot of interesting brushes on it that are easy to download and use.
In this step, you can thicken the lines at the intersections or shadows. This will give your lines a deeper look.
![]()
![]()
shadow
After the basic color is applied, it is necessary to decide the position of the light source. Remember the Sphere Shading Basics course you took? You can draw in the same way.
When drawing shadows, start by painting a rough shape with the shadow color.
![]()
![]()
Once you have the general shape in place, you can keep tinkering with the details until it looks the way you like it.
But since you’re still learning, you don’t need to do much fancy work in the shadows. Draw slowly within a range that you find challenging with your current skills, and then increase the complexity little by little!
![]()
![]()
As you can see, the black hair is somewhat reflective, the same as the gray area on the white hair. I usually add a little extra color to the hair I paint for a prettier look!
So, how to choose the right color?
The short answer is that there is no such thing as the right color! Play around with colors until you find one you like, try adding pink to blue, purple to green, orange to yellow, etc. have fun! Think about how you don’t make black and white hair look like gray or purple or something.
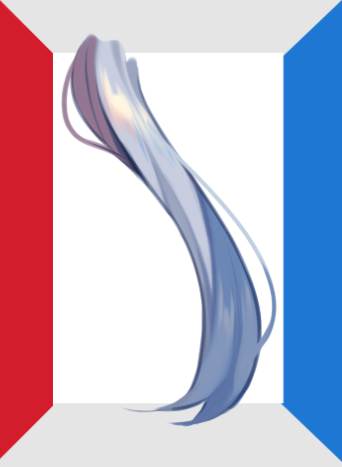
If you paint with colors that are close to the environment in the painting, the tones will look correct. For example, if the character’s clothes are red, I’ll add a little more red tint to the hair. I usually choose colors that are already in the painting and play around with those colors to see how they feel. Like this lock of hair in a blue and red room, with a little bit of both colors in the hair.
![]()
![]()
But if you want to paint more complex hair colors, such as rainbows or gradients, you can choose to add a new layer above the hair, set the blending mode to color increase, and try to see which colors work better, this will not Destroy the gradient.
bright part
This part is pretty fun, and there are so many ways to add shine to your hair.
Yes, even with white hair!
I like to use an airbrush to add some skin color to the bangs so it will show when I paint the white highlights on them!
![]()
![]()
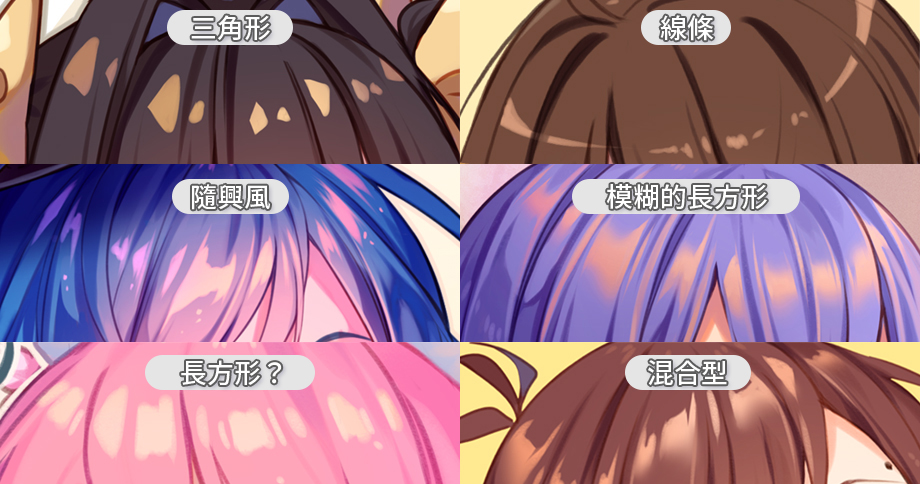
If you don’t know what color to use, you can choose the hair color, create a new layer, set the blending mode to Additive (glow), and add blobs, triangles, or lines, etc. Any shape will do, so just choose the one that suits your style, and then use Hue and Chroma (Ctrl+U) to change the color to match.
![]()
![]()
When I add highlights, I also add a few strands of hair by the way. After all, everyone is troubled by the twisted hair, right?
Another little thing I really like is the sheer lashes and brows. This is easy to do by just locking the line art layer and coloring in a color darker or lighter than your hair. Let’s try it out, this part depends on the hair color you use and whether the line art is set to color enhancement mode.
Epilogue
Maybe after reading this tutorial you are still not sure how to draw hair, but I don’t think you need to become a professional painter right away. Like I always say, art takes time.
So at the end please don’t forget the main point of this instructable – use the references! I can’t say enough about its importance, but make sure to make good use of the references.
I’m pretty sure you don’t need to rely on step-by-step stuff to learn new things. Instead, try to understand things in your own way. As long as you love what you are doing and have the courage to accept the challenges that life brings you, then you will definitely become an artist!
Practice is the key that opens the door to success, but that door is made of patience and passion.
Thank you so much for reading and watching!